Part A — Editing Tools
CapCut और InShot से professional reels बनाना सीखो — step by step
Chapter 1
CapCut Basics — Video Editing सीखो
CapCut दुनिया का सबसे popular free video editing app है। Instagram Reels बनाने के लिए ये सबसे best tool है — powerful features, easy interface, और एक पैसा नहीं लगता। चलो A to Z सीखते हैं।
🎯 CapCut क्यों?
Free है, easy है, और professional results देता है। जो काम पहले laptop पर महँगे software से होता था — वो अब phone पर CapCut से हो जाता है। सबसे बड़ी बात — Hindi text support बहुत अच्छा है।
Step 1: Download और Install
- Google Play Store खोलो
- Search करो "CapCut"
- Developer name check करो: Bytedance Pte. Ltd.
- "Install" tap करो — size लगभग 150 MB है
- Install होने के बाद "Open" करो
- Terms accept करो — account बनाने की ज़रूरत नहीं (skip कर सकते हो)
⚠️ Storage Check
CapCut + edited videos काफी space लेते हैं। कम से कम 2 GB free space रखो phone में। पुराने videos delete करो या Google Photos पर backup लो। Editing के बाद project files भी delete कर सकते हो (exported video safe रहेगी)।
Step 2: New Project बनाओ
- CapCut open करो
- "New Project" button tap करो (+ icon)
- Gallery से अपने video clips select करो — एक या multiple
- "Add" tap करो
- Project open हो जाएगा — editing screen दिखेगी
Step 3: Editing Screen समझो
CapCut की editing screen में 3 main areas हैं:
Area 1: Preview (ऊपर)
ये वो area है जहाँ तुम्हारा video दिखता है। Play button दबाकर preview देख सकते हो। Vertical (9:16) format set करो reels के लिए।
Area 2: Timeline (बीच में)
ये वो strip है जहाँ तुम्हारे video clips, audio, text सब दिखते हैं। इसे zoom in/out कर सकते हो (pinch gesture से)। यहीं से clips को trim, cut, arrange करोगे।
Area 3: Tools Bar (नीचे)
Edit, Audio, Text, Stickers, Effects, Filters — सारे tools यहाँ मिलेंगे। जिस tool पर tap करोगे वो open हो जाएगा।
Step 4: Trim & Cut — काटो-छाँटो
ये सबसे basic और सबसे important skill है:
Trim (शुरू या अंत से काटो):
- Timeline में video clip पर tap करो — selected हो जाएगी (border आ जाएगी)
- Clip के शुरू या अंत के white handle को drag करो
- जितना हिस्सा चाहिए उतना रखो — बाकी कट जाएगा
Split (बीच में से काटो):
- Timeline में वो point ढूँढो जहाँ काटना है
- White playhead (vertical line) उस point पर रखो
- नीचे "Split" button tap करो (कैंची icon)
- Clip दो हिस्सों में बँट जाएगी
- जो हिस्सा नहीं चाहिए — उसे tap करो और "Delete" करो
💡 Practice Scenario
तुमने 3 minute का interview लिया। इसमें से 45 seconds की reel बनानी है। तो:
- पूरा video एक बार देखो
- Best 4-5 moments identify करो (जहाँ सामने वाले ने अच्छी बात बोली)
- हर moment के पहले और बाद में Split करो
- बाकी सब हिस्से Delete करो
- बचे हुए clips को arrange करो — Result → Before → After → CTA
Step 5: Transitions — Clips जोड़ो Smoothly
जब दो clips मिलती हैं तो बीच में एक sudden jump आता है। Transition इसे smooth बनाता है:
- दो clips के बीच के white square icon पर tap करो
- Transitions list open होगी
- Simple transitions choose करो: "Fade", "Dissolve", या "Slide"
- Duration 0.3-0.5 seconds रखो — ज़्यादा slow transition boring लगता है
⚠️ Transition Rules
Fancy transitions (Star wipe, Spin, Zoom burst) — ये बचकाना दिखता है। Professional reels में simple transitions ही use होते हैं। "No transition" (straight cut) भी बिल्कुल fine है — actually most professional editors straight cuts prefer करते हैं!
Step 6: Text Overlay — Screen पर Text डालो
- नीचे toolbar में "Text" tap करो
- "Add Text" tap करो
- Hindi में type करो (phone keyboard Hindi पर set करो)
- Font choose करो — bold, readable fonts best
- Color choose करो — white with black outline सबसे safe
- Text को screen पर drag करके position set करो
- Timeline में text की duration set करो (कब appear, कब disappear)
Text कहाँ-कहाँ use करो:
- Hook text: पहले 3 seconds — बड़ा bold text (जैसे "₹15,000/month!")
- Subtitles: Important dialogues का text — center-bottom position
- Numbers: Key statistics, prices, quantities
- Labels: "पहले" / "अब" — Before-After reels में
- CTA text: "Follow @handle" / "Link in Bio"
💡 Text Tips
Font size 40+ रखो — mobile screen पर छोटा text पढ़ा नहीं जाता। एक screen पर 2-3 lines max। Background blur/color block add करो text के पीछे ताकि readable रहे।
Step 7: Export Settings — Final Video निकालो
- ऊपर right corner में Export/Download icon (↑) tap करो
- Resolution: 1080p select करो (Full HD)
- Frame Rate: 30fps
- Export tap करो
- Video gallery में save हो जाएगी
✍️ Activity — First CapCut Edit
अभी अपने phone पर CapCut open करो और ये practice करो:
- कोई भी video लो (selfie भी चलेगी)
- New Project बनाओ
- Video को trim करो (शुरू और अंत से)
- बीच में एक Split करो
- एक text add करो — "Practice Edit"
- Export करो 1080p में
बस 10 minutes लगेंगे — और CapCut basics समझ आ जाएँगे!
Advanced CapCut Features
Speed Control
Clip की speed बदलो — slow motion (0.5x) या fast forward (2x):
- Clip select करो → "Speed" tap करो
- "Normal" mode में slider से speed adjust करो
- B-Roll clips को 1.5x-2x speed पर दिखाओ — time बचता है
- Emotional moments को 0.7x slow करो — impact बढ़ता है
Filters & Adjust
Video की brightness, contrast, saturation adjust करो:
- "Adjust" tap करो
- Brightness: +10 to +20 (slightly brighter)
- Contrast: +5 to +15
- Saturation: +5 to +10 (colors pop करेंगे)
- Warmth: +5 to +10 (rural footage पर warm tone अच्छा लगता है)
Keyframes — Motion Effect
Static shot में subtle zoom effect add करो:
- Clip select करो
- Timeline में starting point पर जाओ → Keyframe icon (◇) tap करो
- Ending point पर जाओ → Pinch zoom करो (थोड़ा zoom in)
- Play करो — slowly zoom होगा — cinematic feel!
Remove Background
CapCut में background remove करके green screen जैसा effect बना सकते हो:
- Clip select करो → "Remove BG" tap करो
- AI automatically background हटा देगा
- Replace background — solid color, image, या दूसरा video
📝 Homework — Chapter 1
- CapCut download करो (अगर नहीं किया)
- 3 practice videos edit करो — trim, split, text, export
- एक video में transition add करो (simple — Fade या Dissolve)
- एक video में speed change try करो (slow + fast दोनों)
- एक video में filter/adjust करो — brightness, contrast, warmth
Chapter 2
InShot Alternative — जब CapCut न चले
कुछ phones पर CapCut ठीक से काम नहीं करता — especially पुराने phones जिनमें कम RAM (2GB) है। ऐसे में InShot एक बढ़िया alternative है। ये lighter है, कम space लेता है, और almost सारे ज़रूरी features देता है।
🎯 InShot कब Use करो?
अगर तुम्हारा phone: (1) 2GB RAM या कम है, (2) CapCut crash हो रहा है, (3) Storage बहुत कम है (InShot ~40MB vs CapCut ~150MB), (4) पुराना Android version है (Android 7 या पुराना) — तो InShot use करो।
Download और Setup
- Play Store → Search "InShot" → Developer: InShot Inc.
- Install करो — size ~40 MB
- Open करो → "Video" option tap करो
- Gallery से clips select करो → checkmark tap करो
InShot Editing Workflow
Step 1: Trim & Cut
- Timeline में clip tap करो
- "Trim" option — शुरू/अंत से काटो
- "Split" option — बीच में से काटो
- Same concept as CapCut — बस buttons अलग जगह हैं
Step 2: Canvas Size
- "Canvas" tap करो
- 9:16 select करो (Instagram Reels)
- Background color set करो — blur background या solid color
Step 3: Text
- "T" icon tap करो → Text type करो
- Hindi fonts available हैं
- Color, size, position adjust करो
- Duration set करो timeline में
Step 4: Music
- "Music" icon → "Tracks" → InShot library से choose करो
- या "My Music" से phone की music import करो
- Volume adjust करो
Step 5: Export
- Right corner में share/export icon tap करो
- Resolution: 1080p
- Save करो
CapCut vs InShot — Comparison
| Feature | CapCut | InShot |
|---|
| App Size | ~150 MB | ~40 MB |
| RAM Required | 3GB+ recommended | 2GB works fine |
| Text Options | Excellent (Hindi fonts) | Good (Hindi fonts) |
| Transitions | Many options | Basic options |
| Speed Control | Advanced (curves) | Basic (slider) |
| Remove Background | Yes (AI) | No |
| Keyframes | Yes | No |
| Templates | Many ready templates | Few |
| Price | Free (with watermark option) | Free (ads + watermark) |
| Watermark | Removable for free | Removable (watch ad) |
| Best For | Full-feature editing | Quick, simple edits |
💡 Watermark हटाओ
CapCut: Export करते समय "CapCut watermark" option uncheck करो — free में हट जाता है। InShot: Export के बाद watermark दिखेगा — "Remove" tap करो → 30 second ad देखो → watermark हट जाएगा। Professional reels पर watermark नहीं होना चाहिए!
✍️ Activity — InShot Practice
अगर तुम्हारे पास दोनों apps हैं तो एक ही video को दोनों में edit करो — compare करो कौन सा तुम्हें ज़्यादा comfortable लगा।
📝 Homework — Chapter 2
- InShot download करो (backup tool के तौर पर)
- 1 video InShot में edit करो — trim, text, music, export
- Compare करो — CapCut vs InShot, तुम्हें कौन सा comfortable लगा? क्यों?
Part B — Branding & Design
KaryoSetu का Brand Look बनाओ — consistent colors, logo placement, professional templates
Chapter 3
KaryoSetu Branding — रंग, लोगो, Templates
जब तुम्हारी हर reel एक जैसी "feel" देती है — same colors, same style, same logo — तो लोग scroll करते-करते भी पहचान लेते हैं "ये तो उस Setu Star का video है!" ये है branding — और ये बहुत powerful है।
🎯 Branding क्यों?
Instagram पर हज़ारों reels हैं। तुम्हारी reel 2 seconds में identify हो जानी चाहिए — बिना username पढ़े। Consistent branding = instant recognition = trust = followers।
KaryoSetu Official Colors
ये colors हमेशा use करो — consistent रहो:
| Color | Code | कहाँ Use करो |
|---|
| 🟢 KaryoSetu Green (Primary) | #1B5E20 | Main branding, backgrounds, headers |
| 🟢 Light Green | #4CAF50 | Accents, highlights, icons |
| 🟡 KaryoSetu Gold | #FFD600 | Stars, highlights, special text |
| 🟣 Setu Star Purple | #7C3AED | Star-specific content, badges |
| ⚪ White | #FFFFFF | Text, clean backgrounds |
| ⚫ Dark | #1A1A1A | Text, contrast elements |
Logo Placement
KaryoSetu logo हर reel में होना चाहिए — subtle लेकिन visible:
Option 1: Corner Logo (Recommended)
- Top-right corner में छोटा KaryoSetu logo
- Size: Screen width का ~15%
- Opacity: 70-80% (थोड़ा transparent)
- पूरी reel में constant रहे
Option 2: Opening/Closing Frame
- शुरू में 1.5 seconds — Green background + Logo + "KaryoSetu | Shop Spotlight"
- अंत में 2-3 seconds — Logo + "Download Now" + QR code
Option 3: Watermark Style
- Bottom-center में small text — "KaryoSetu.com" या "@karyosetu"
- Semi-transparent white text
Banner Templates — Ready-to-Use
CapCut में ये templates save करो:
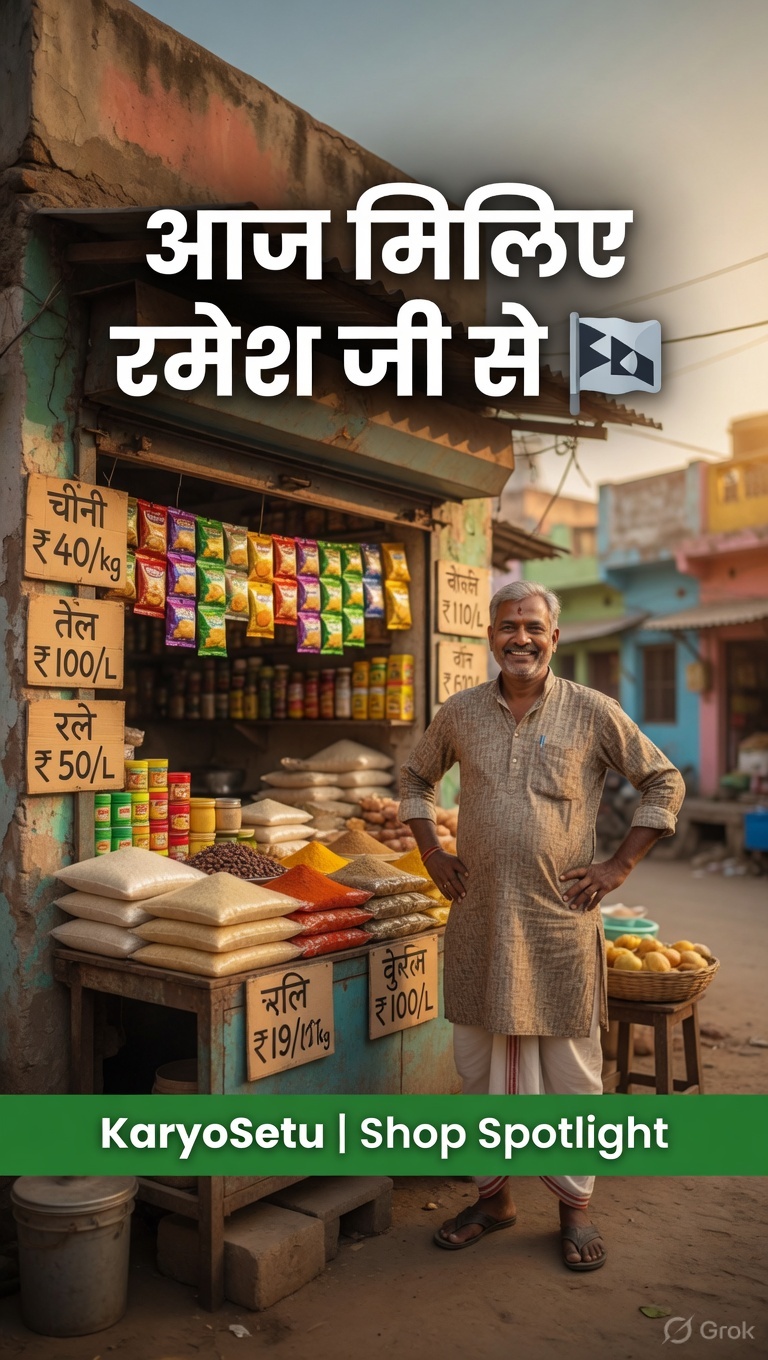
Template 1: "Shop Spotlight" (दुकान की कहानी)
| Element | Specification |
|---|
| Opening Banner | Green (#1B5E20) background, "KaryoSetu | Shop Spotlight" white text, logo left |
| Duration | 1.5 seconds |
| Font | Inter Bold, 36px |
| Subtitle bar | Gold (#FFD600) strip at bottom — shop name text |
Template 2: "Success Story" (सफलता की कहानी)
| Element | Specification |
|---|
| Opening Banner | Purple (#7C3AED) to Green gradient, "सफलता की कहानी" text |
| Duration | 1.5 seconds |
| Star badge | Gold star icon + "Setu Star Presents" |
| Lower third | Person name + business type, green background strip |
Template 3: "Business Tips" (टिप्स)
| Element | Specification |
|---|
| Opening Banner | Green background, "3 Tips" in bold gold, category text in white |
| Tip Number | Circled number (1, 2, 3) in gold — left side |
| Closing | "Follow for more tips! @handle" + KaryoSetu logo |
Template 4: Closing Frame (सब reels के लिए)
| Element | Specification |
|---|
| Background | Green (#1B5E20) gradient |
| Logo | Center — KaryoSetu logo (large) |
| Text Line 1 | "अभी Download करो!" in Gold (#FFD600) |
| Text Line 2 | "Link in Bio ↓" in White |
| Duration | 2-3 seconds |
Font Recommendations
| Use Case | Font | Style |
|---|
| Headlines / Hooks | Impact / Bebas Neue | Bold, ALL CAPS feel |
| Subtitles / Body | Inter / Noto Sans Hindi | Regular, clean |
| Numbers / Stats | JetBrains Mono / DIN | Bold, monospace |
| Hindi Text | Noto Sans Devanagari | Regular or Bold |
⚠️ Font Consistency
एक ही reel में 2 से ज़्यादा fonts use मत करो। एक headline font + एक body font — बस। ज़्यादा fonts = messy = unprofessional।
✍️ Activity — Template बनाओ
CapCut में एक "Closing Frame" template बनाओ:
- New Project → Green color background image add करो
- "KaryoSetu" text add करो — white, large
- "Download Now — Link in Bio" text add करो — gold color
- 3 seconds duration रखो
- Export करो और save करो — हर reel के end में इसे add करो
📝 Homework — Chapter 3
- Color palette screenshot save करो — Green, Gold, Purple, White, Dark
- 4 templates बनाओ (Shop Spotlight, Success Story, Tips, Closing)
- अपनी पिछली 3 reels में KaryoSetu branding add करो (logo, colors)
- एक "Brand Board" बनाओ — सारे colors, fonts, logo एक place पर
Chapter 4
Text & Captions — Hindi Text लिखो
Instagram पर 40% लोग reels बिना sound (mute) देखते हैं — मतलब अगर तुम्हारी reel में text/captions नहीं हैं, तो 40% audience को कुछ समझ ही नहीं आएगा! Text overlay बहुत ज़रूरी है।
🎯 Rule of Mute
तुम्हारी reel mute पर भी समझ आनी चाहिए। हर key point text में भी दिखाओ। ये "Mute Test" करो — reel को mute पर play करो। अगर main message समझ आ रहा है तो perfect। नहीं तो और text add करो।
Hindi Text Type कैसे करो
Phone keyboard पर Hindi typing set करना:
Google Keyboard (Gboard):
- Settings → System → Languages & Input → On-screen keyboard
- Gboard → Languages → "Add keyboard" → Hindi
- Typing में space bar long-press करके Hindi keyboard switch करो
- Transliteration mode (Hinglish → Hindi auto-convert) भी available है
CapCut में Hindi Text:
- "Text" → "Add Text" tap करो
- Keyboard को Hindi switch करो
- Type करो — Hindi text directly दिखेगा
- Font select करो — Noto Sans Devanagari या similar Hindi-supporting font
Subtitle Placement — कहाँ रखो Text
| Position | कब Use करो | Details |
|---|
| Center-Bottom | Subtitles / Captions | Screen के bottom 1/3 में, center aligned |
| Center-Center | Hook text / Numbers | Screen के बीचोंबीच — maximum impact |
| Top-Center | Labels / Categories | "Shop Spotlight", "Tips" जैसे labels |
| Bottom-Left | Name / Location | Person ka naam, location |
⚠️ Safe Zone
Instagram reels में bottom 15-20% area में UI elements (like, comment, share buttons) आते हैं। Text इस area में मत रखो — छिप जाएगा! Top 10% में भी username/caption area होता है। Safe zone बीच का 70% area है।
Font Size Guide
- Hook/Headline: 48-60px — बड़ा, bold, attention-grabbing
- Subtitles: 28-36px — readable, clean
- Labels/Tags: 20-24px — small but visible
- Fine Print: 16-18px — barely noticeable, for disclaimers
Text Animation — Movement दो
Static text boring लगता है — थोड़ा animation add करो:
CapCut Text Animations:
- Text select करो → "Animation" tap करो
- "In" animation: कैसे appear होगा (Fade In, Slide Up, Pop In)
- "Out" animation: कैसे disappear होगा (Fade Out)
- "Loop" animation: continuous motion (Typewriter, Bounce)
💡 Best Animations
Subtitles: Fade In + Fade Out (clean, professional)। Headlines: Pop In (attention-grabbing)। Numbers: Scale Up (dramatic)। Avoid: Spin, Bounce Loop, Rainbow — unprofessional।
Text Background / Text Box
कभी-कभी video background busy होता है और text readable नहीं होता। Solution:
- Background Box: Text के पीछे solid color box (dark with opacity 60-70%)
- Text Stroke: Text outline — white text पर black outline
- Shadow: Subtle drop shadow text पर
- Blur: Text area में background blur
Caption Writing — रील की Description
Reel post करते समय caption भी important है:
Caption Structure:
- Hook line: पहली line attention-grabbing (ये feed में दिखती है)
- Story summary: 2-3 lines में कहानी
- CTA: "Save करो", "Share करो", "Comment में बताओ"
- Hashtags: 15-20 relevant hashtags (अगला chapter)
🎙️ Caption Template
₹6,000 से ₹15,000 — बस एक listing का कमाल! 🔥
सुरेश भाई, दर्जी — 12 साल से सिलाई करते हैं। पहले सिर्फ अपने मोहल्ले के 5 ग्राहक। KaryoSetu पर listing बनाई — अब 3 गाँवों से 25+ ग्राहक!
आप भी अपना हुनर दुनिया को दिखाओ 👇 Link in Bio
#KaryoSetu #SetuStar #GaonKaDukandaar #VillageBusinessIndia #SmallBusiness ...
📝 Homework — Chapter 4
- 3 reels में Hindi text overlay add करो — subtitles + hook text
- 5 different caption templates लिखो (Story, Tips, Fun, Tutorial, Motivation)
- "Mute Test" करो — अपनी reels mute पर देखो, text से message clear हो?
- Text animation practice — 3 styles try करो (Fade, Pop, Slide)
Part C — Audio & Music
सही music, सही volume, सही timing — audio game strong करो
Chapter 5
Music & Sound — आवाज़ का जादू
एक reel का 50% impact उसके audio से आता है। सही music, सही volume, सही timing — ये average reel को एक level up कर देता है। चलो audio mastery सीखते हैं।
Voiceover vs Background Music — कब क्या?
| Content Type | Best Audio Choice | Details |
|---|
| Interview/Story | Original Audio + Soft BG Music | Interview audio primary, music very low (10-15%) |
| Tips Reel (face-to-camera) | Voiceover + Medium BG Music | Voice primary, music 20-25% |
| B-Roll Montage | Voiceover + Trending Audio | Narration over visuals + popular music |
| Before-After | Mix — Emotional Music Shifts | Sad/soft music for Before, upbeat for After |
| Fun/Village Life | Trending Audio | Popular song/sound for discoverability |
Trending Audio कहाँ ढूँढो
Method 1: Instagram Reels Tab
- Instagram → Reels tab (bottom center)
- Scroll करो — जो audio बार-बार आ रहा है वो trending है
- Audio name पर tap करो → "Save Audio" करो
- जब reel बनाओ तब saved audio use करो
Method 2: CapCut Music Library
- CapCut → project → "Audio" → "Sounds"
- "Trending" section check करो
- Indian/Bollywood category में Hindi music मिलेगा
- Preview सुनो → Add करो
Method 3: YouTube Audio Library (Copyright Free)
YouTube Studio → Audio Library → Free music download करो → CapCut में import करो। ये 100% copyright-free है — कभी strike नहीं आएगी।
⚠️ Copyright Warning
Bollywood songs directly use करना risky है — copyright claim आ सकता है और reel mute हो सकती है। Safe options: (1) Instagram built-in music library, (2) CapCut free music, (3) YouTube Audio Library, (4) Original voiceover + subtle background music।
Volume Balance — सबसे Important
Volume balance ग़लत हो तो सब बर्बाद:
| Audio Layer | Volume Level |
|---|
| Main Voice / Interview | 100% |
| Voiceover | 90-100% |
| Background Music (with voice) | 10-20% |
| Background Music (no voice parts) | 40-60% |
| Sound Effects | 30-50% |
CapCut में Volume Adjust:
- Audio track select करो (timeline में)
- "Volume" slider दिखेगा
- Drag करके adjust करो
- Preview करके check करो — headphones पहनकर!
💡 Headphone Test
Edit करते समय हमेशा headphones/earphones use करो। Phone speaker पर audio balance ठीक लग सकता है लेकिन headphones पर problem दिखेगी। Final check — earphones में सुनो, phone speaker पर सुनो, दोनों में clear हो तो perfect।
Voiceover Recording Tips
कब voiceover दो: जब तुम B-Roll footage पर narration करना चाहो, या interview में extra context add करना हो।
Recording Tips:
- शांत room: Fan बंद, window बंद, TV बंद
- Phone mouth से 6-8 inches दूर: बहुत करीब = breathy/distorted, बहुत दूर = faint
- Earphone mic: Phone mic से better quality — earphone mic use करो
- Script पढ़ो, memorize मत करो: Natural लगने के लिए notes देखकर बोलो, लेकिन रटा हुआ मत बोलो
- Energy रखो: Monotone (एक ही tone) boring है — voice में excitement, surprise, emotion लाओ
- Mistakes पर रुको मत: ग़लती हो तो 2 second pause लो, फिर दोबारा बोलो — editing में काट दोगे
CapCut में Voiceover Record:
- Project open करो
- "Audio" → "Record" tap करो
- Mic icon दबाओ — recording start
- Timeline पर video देखते हुए narrate करो
- Stop tap करो — voiceover add हो गया
Sound Effects — छोटे-छोटे Touches
Subtle sound effects reel को professional बनाते हैं:
- "Whoosh": Text appear होने पर — attention grab
- "Ting/Bell": Number flash होने पर — highlight
- "Pop": New point appear होने पर
- Applause: Success moment पर — celebration feel
CapCut में "Audio" → "Effects" section में ये सब free मिलते हैं।
✍️ Activity — Audio Mastery
- एक reel में voiceover record करो (CapCut का Record feature use करो)
- Background music add करो — volume 15% रखो
- 2 sound effects add करो (text appear पर)
- Headphones पहनकर preview करो
- Phone speaker पर भी check करो
📝 Homework — Chapter 5
- 3 trending audio save करो Instagram से (अगले reels के लिए)
- 1 voiceover reel बनाओ — B-Roll footage + narration
- Copyright-free music find करो — YouTube Audio Library से 5 tracks download
- Volume balance practice — एक reel में interview audio + background music properly balance करो
- 2 sound effects try करो किसी reel में
Part D — Publishing Strategy
Hashtags, Posting Times, और Collab — सही strategy से reach बढ़ाओ
Chapter 6
Hashtag Strategy — #सही_हैशटैग
Hashtags Instagram पर तुम्हारी reel को discover करने का एक main तरीका है। सही hashtags = ज़्यादा लोगों तक पहुँच। ग़लत hashtags = रeel कहीं खो जाती है। चलो strategy समझते हैं।
🎯 Hashtag क्या करता है?
Hashtag तुम्हारी reel को categorize करता है। जब कोई #GaonKaDukandaar search करेगा, तो वो सारी reels दिखेंगी जिनमें ये hashtag है — तुम्हारी reel भी! ज़्यादा relevant hashtags = ज़्यादा discoverability।
3 Categories of Hashtags
हर reel में 3 तरह के hashtags use करो — ये "Triple Layer" strategy है:
Layer 1: Brand Hashtags (3-5)
ये हमेशा same रहेंगे — हर reel में:
- #KaryoSetu — main brand
- #SetuStar — तुम्हारा program
- #KaryoSetuStories — story content
- #HarHaathKoKaam — brand tagline
- #HarGaonKoPehchaan — brand tagline
Layer 2: Niche Hashtags (5-8)
तुम्हारे content topic के हिसाब से:
- #GaonKaDukandaar — village shopkeeper content
- #VillageBusinessIndia — rural business
- #GraminUdyog — rural enterprise
- #DigitalGaon — digital village
- #RuralEntrepreneur — rural startup
- #SelfHelpGroup — SHG content
- #KisanVikas — farmer growth
- #LocalBusiness — local shops
- #SmallBusinessIndia — Indian small business
- #MakeInVillage — village-made products
Layer 3: Trending/General Hashtags (5-7)
Popular, high-volume hashtags (weekly check करो, ये बदलते रहते हैं):
- #Reels — generic but high volume
- #ReelsIndia
- #Trending
- #Viral
- #Motivation
- #SuccessStory
- #BusinessTips
Hashtag Template — Copy-Paste Ready
🎙️ Template: Story Reel Hashtags
#KaryoSetu #SetuStar #KaryoSetuStories #HarHaathKoKaam #HarGaonKoPehchaan #GaonKaDukandaar #VillageBusinessIndia #RuralEntrepreneur #DigitalGaon #GraminUdyog #SmallBusinessIndia #SuccessStory #Motivation #ReelsIndia #Trending #MakeInVillage #LocalBusiness
🎙️ Template: Tips Reel Hashtags
#KaryoSetu #SetuStar #BusinessTips #HarHaathKoKaam #GaonKaDukandaar #SmallBusinessIndia #RuralEntrepreneur #DigitalGaon #BusinessGrowth #Tips #ReelsIndia #Trending #GraminUdyog #VillageBusinessIndia #LocalBusiness #OnlineBusiness
🎙️ Template: Agriculture Reel Hashtags
#KaryoSetu #SetuStar #KisanVikas #HarHaathKoKaam #Agriculture #Farming #IndianFarmer #KisanHitMein #OrganicFarming #RuralIndia #FarmToTable #GraminUdyog #ReelsIndia #Trending #AgriTech #SmartFarming
Hashtag Rules — Do's and Don'ts
| ✅ Do's | ❌ Don'ts |
|---|
| 15-20 hashtags per post | 30 से ज़्यादा मत डालो (spammy लगता है) |
| Mix of sizes (small + medium + large) | सिर्फ #viral #trending जैसे generic मत डालो |
| Relevant hashtags ही use करो | Unrelated hashtags मत डालो (#food किसी electrician reel पर) |
| Weekly rotate करो trending ones | हर reel पर same exact hashtags मत लगाओ |
| Caption में या first comment में डालो | Hashtags में spaces/special characters मत डालो |
💡 Hashtag Size Strategy
Small hashtags (under 50K posts): #GaonKaDukandaar, #KaryoSetuStories — competition कम, तुम्हारी reel दिखेगी। Medium (50K-500K): #RuralEntrepreneur, #SmallBusinessIndia — moderate reach। Large (500K+): #Trending, #Motivation — बहुत competition, लेकिन reach potential huge। Mix करो!
✍️ Activity — Hashtag Bank बनाओ
Phone के Notes में "Hashtag Templates" save करो:
- Story Reel — 20 hashtags copy-paste ready
- Tips Reel — 20 hashtags
- Agriculture Reel — 20 hashtags
- Fun/Village Life — 20 hashtags
- General — 15 hashtags
जब post करो — बस Notes से copy-paste! Time बचेगा।
📝 Homework — Chapter 6
- 5 Hashtag templates बनाओ (different content types के लिए)
- Instagram पर 10 niche hashtags research करो — posts count check करो
- अगली 3 reels में proper hashtag strategy use करो
- 1 week बाद check करो — hashtags से कितनी extra reach आई (Insights में दिखता है)
Chapter 7
Best Posting Times — कब Post करो
तुमने अच्छी reel बनाई, editing perfect है, hashtags सही लगाए — लेकिन अगर ग़लत time पर post किया तो? कम लोग online होंगे, कम views आएँगे, algorithm reel को push नहीं करेगा। Timing matters!
🎯 Why Timing Matters
Instagram algorithm reel को पहले तुम्हारे followers के small group को दिखाता है। अगर वो engage करें (like, comment, share, save) तो algorithm और लोगों को दिखाता है। अगर पहले batch ने ignore किया? Reel buried हो जाती है। इसलिए — ऐसे time पर post करो जब तुम्हारे followers online हों!
Best Times for Rural India Audience
तुम्हारा audience rural India है — इनका routine city वालों से अलग है:
| Time Slot | Why It Works | Rating |
|---|
| 🌅 8:00 - 9:00 AM | सुबह की चाय, phone check — दिन शुरू होने से पहले scroll | ⭐⭐⭐⭐ |
| 🌞 12:00 - 1:00 PM | दोपहर का lunch break — खाना खाते हुए phone देखते हैं | ⭐⭐⭐⭐⭐ |
| 🌙 7:00 - 9:00 PM | दिन का काम खत्म, dinner के बाद — relaxation time, सबसे ज़्यादा active | ⭐⭐⭐⭐⭐ |
| ☀️ 10:00 - 11:00 AM | काम के बीच break — moderate activity | ⭐⭐⭐ |
| 🌆 4:00 - 5:00 PM | शाम को काम खत्म होने लगता है — decent | ⭐⭐⭐ |
Day-Wise Posting Strategy
| दिन | Best Time | Content Type | Notes |
|---|
| Monday | 8 AM | Motivation / Success Story | Week start — inspiring content |
| Tuesday | 12 PM | Tips Reel | Lunch break — educational content |
| Wednesday | 7 PM | Tutorial / How-to | Mid-week — practical content |
| Thursday | 12 PM | Before-After Story | Lunch break — story content |
| Friday | 8 PM | Fun / Village Life | Weekend mood — light content |
| Saturday | 9 AM | Best-of / Recap | Morning chai — relaxed browsing |
| Sunday | 11 AM | Behind-the-Scenes / Q&A | Holiday — long browsing sessions |
Scheduling — पहले से तैयार करो
हर दिन real-time में content बनाना और post करना exhausting है। Better approach — batch create + schedule:
Batch Creation Method:
- Sunday: पूरे हफ्ते के scripts लिखो
- Monday-Tuesday: 3-4 reels shoot करो
- Wednesday: सारी reels edit करो
- Thursday-Sunday: Scheduled time पर post करो (1 reel/day)
💡 Instagram Scheduler
Instagram Professional Account (Creator/Business) में built-in scheduler है। Reel ready हो तो "Schedule" option select करो → date और time set करो → automatically post हो जाएगी! तुम्हें उस time phone उठाने की ज़रूरत नहीं।
Testing Your Best Time
ऊपर दिए गए times general guidelines हैं। तुम्हारे specific audience का best time different हो सकता है। Test करो:
2-Week Testing Method:
- Week 1: Morning (8 AM), Afternoon (12 PM), Evening (7 PM) — 2-2 reels each time
- Note करो: किस time पर सबसे ज़्यादा views/engagement आई?
- Week 2: Best performing time slot पर ज़्यादा post करो
- Instagram Insights check करो — "Most Active Times" section दिखाता है कब followers online हैं
💡 Real Data Example
एक सेतु स्टार ने 2 weeks test किया:
- Morning 8 AM posts: Average 800 views
- Afternoon 12 PM posts: Average 1,200 views
- Evening 8 PM posts: Average 2,100 views
Conclusion: उसके audience के लिए evening 7-9 PM best time था। अब वो ज़्यादातर reels evening में post करता है — consistent 2,000+ views!
⚠️ Common Timing Mistakes
1. रात 11 PM के बाद post: Rural India रात जल्दी सो जाता है — late night posting से कम reach। 2. सुबह 6 AM से पहले: लोग उठे नहीं होते। 3. दोपहर 2-4 PM: Work hours — engagement low। 4. एक दिन में 3+ reels: Quality over quantity — 1 good reel > 3 average reels।
📝 Homework — Chapter 7
- 2-week posting time test करो — morning, afternoon, evening
- Results track करो spreadsheet/notes में — time vs views vs engagement
- Instagram Insights → Audience → "Most Active Times" check करो
- अपना weekly content calendar बनाओ — day + time + content type
- 1 reel schedule करो Instagram scheduler से (अगर Professional Account है)
Chapter 8
Collab Posting — KaryoSetu के साथ
Instagram का Collab feature बहुत powerful है — एक reel दो accounts पर एक साथ publish होती है। जब तुम @karyosetu के साथ collab post करते हो, तो तुम्हारी reel उनके followers को भी दिखती है — instant reach boost!
🎯 Collab क्यों करो?
तुम्हारे followers शायद 500-1,000 हैं। KaryoSetu page पर 10,000+ followers हैं। Collab post दोनों audiences को दिखती है — तो तुम्हारी reel 10x ज़्यादा लोगों तक पहुँचती है! Plus, KaryoSetu का verified brand trust तुम्हारे content को credibility देता है।
Collab Post कैसे बनाओ — Step by Step
Step 1: Reel बनाओ और Ready रखो
पहले अपनी reel normally बनाओ — shoot, edit, export। Quality check करो — ये represent करेगी KaryoSetu brand को, तो professional होनी चाहिए।
Step 2: Post करते समय "Tag People" पर जाओ
- Instagram → "+" → "Reel" → अपनी edited reel select करो
- "Next" tap करो
- Cover image choose करो
- "Next" tap करो → Caption screen आएगी
- "Tag People" tap करो
Step 3: "Invite Collaborator" Select करो
- "Tag People" screen पर "Invite Collaborator" option दिखेगा
- Tap करो
- Search करो: @karyosetu
- Select करो
- "Done" tap करो
Step 4: Caption + Hashtags + Post
- Caption लिखो (proper format में — hook + story + CTA)
- Hashtags add करो
- Location add करो (अपने area का)
- "Share" tap करो
Step 5: Wait for Approval
Reel post हो जाएगी तुम्हारे account पर। लेकिन collab active होने के लिए KaryoSetu team को accept करना होगा:
- Approval usually 24-48 hours में आता है
- जब तक approve नहीं होती, reel सिर्फ तुम्हारे followers को दिखेगी
- Approve होने के बाद — दोनों accounts पर दिखेगी!
⚠️ Collab Request Reject हो सकती है अगर:
1. Video quality poor है (dark, shaky, unclear audio)। 2. Content off-brand है (inappropriate, misleading, false claims)। 3. KaryoSetu branding missing (no logo, wrong colors)। 4. False numbers/claims (exaggerated results)। 5. No proper CTA। Quality content बनाओ — approval easily मिलेगा!
Collab Approval Checklist
Request भेजने से पहले ये check करो:
- ☐ Video quality: Clear, bright, stable, good audio
- ☐ KaryoSetu branding: Logo visible, correct colors
- ☐ Content: Genuine story, real person, real numbers
- ☐ Duration: 30-90 seconds (not too long)
- ☐ Caption: Professional, proper format
- ☐ Hashtags: Brand + Niche + Trending (15-20)
- ☐ No copyright music issues
- ☐ CTA present (Download, Follow, Link in Bio)
- ☐ Hindi text/subtitles present
Other Collab Opportunities
1. Other Setu Stars
अपने area या nearby areas के Setu Stars के साथ collab करो:
- Joint interview — दो Stars मिलकर एक shopkeeper का interview लें
- Shoutout exchange — तुम उनको promote करो, वो तुमको
- Duet style content — same topic पर दो perspectives
2. Local Businesses
जिन businesses की story बनाई — उनके साथ collab post करो। उनके followers भी देखेंगे — win-win!
3. Local Influencers
अगर तुम्हारे area में कोई छोटा-मोटा influencer है (even 1,000-5,000 followers) — उसके साथ collab करो। Cross-promotion बहुत effective है early stage में।
💡 Collab Success Example
एक सेतु स्टार ने एक SHG group की story बनाई और @karyosetu को collab invite भेजा। Results:
- Without collab: Expected ~800 views (normal reach)
- With collab (after approval): 4,500 views — 5.6x boost!
- New followers: 120+ from KaryoSetu audience
- Comments: 45 — including people asking about the SHG products
- App downloads from that reel: ~25 (tracked via referral code)
✍️ Activity — First Collab
- अपनी best reel choose करो (highest quality, proper branding)
- Collab checklist से verify करो — सब points check हैं?
- @karyosetu को collab invite भेजो
- 24-48 hours wait करो — approval आने पर analytics track करो
- Result note करो — collab vs non-collab reel comparison
📝 Homework — Chapter 8
- 1 collab request @karyosetu को भेजो
- 2 nearby Setu Stars ढूँढो (Setu Star group में पूछो) — connect करो
- 1 shoutout exchange plan करो किसी Setu Star के साथ
- Collab checklist print/save करो — हर collab request से पहले use करो
- अपनी 3 best reels का एक "portfolio" बनाओ — collab opportunities के लिए दिखाने को
Final Assessment
Module 6 — Final Quiz
🧠 Quiz — Module 6: एडिटिंग और पोस्टिंग
- CapCut में video को बीच से काटने (split) का process क्या है?
→ Timeline में playhead (white line) उस point पर ले जाओ → "Split" (कैंची icon) tap करो → clip दो हिस्सों में बँट जाएगी → unwanted part select करो → Delete।
- KaryoSetu की official brand colors कौन सी हैं? कम से कम 3 बताओ।
→ (1) Green #1B5E20 (primary), (2) Gold #FFD600 (highlights), (3) Purple #7C3AED (Setu Star), (4) White #FFFFFF, (5) Dark #1A1A1A।
- Hashtag strategy में "Triple Layer" approach क्या है?
→ Layer 1: Brand hashtags (#KaryoSetu, #SetuStar) — 3-5. Layer 2: Niche hashtags (#GaonKaDukandaar, #RuralEntrepreneur) — 5-8. Layer 3: Trending/General hashtags (#Trending, #Motivation) — 5-7. Total 15-20 per post।
- Rural India audience के लिए best posting times कौन से हैं और क्यों?
→ (1) 8-9 AM — सुबह चाय के साथ phone check। (2) 12-1 PM — lunch break, सबसे active। (3) 7-9 PM — दिन का काम खत्म, dinner के बाद relaxation — MOST active time।
- Collab post में @karyosetu की approval मिलने के लिए 4 ज़रूरी conditions क्या हैं?
→ (1) High quality video (clear, bright, stable audio), (2) KaryoSetu branding present (logo, colors), (3) Genuine content (real story, real numbers), (4) Proper CTA and caption with hashtags। Quality professional होनी चाहिए।
Final Assignment
Module 6 — Final Homework
📝 Module 6 — Complete Assignment
- CapCut Mastery: 5 reels edit करो — trim, split, text, music, transitions, export 1080p
- Branding: 4 templates बनाओ और save करो (Opening + Closing + Story + Tips)
- Text: हर reel में Hindi text overlay + subtitles add करो
- Audio: 1 voiceover reel बनाओ, 1 trending audio reel बनाओ
- Hashtags: 5 hashtag templates बनाओ, Notes में save करो
- Timing: 1 week posting schedule बनाओ (day + time + content type)
- Collab: 1 collab request @karyosetu को भेजो
- Post: 5 reels post करो इस module की learnings apply करके
- Analyze: सब 5 reels की analytics compare करो — best performer identify करो
- Iterate: Best performing reel से क्या सीखा? अगली reels में कैसे apply करोगे?
💡 Module 7 Preview
Module 6 done! अब तुम editing, branding, hashtags, timing, और collab सब जानते हो। Module 7 में सीखेंगे — page कैसे grow करो, followers कैसे बढ़ाओ, engagement strategy, WhatsApp sharing, और analytics। तैयार रहो — growth game शुरू!