CapCut is the most powerful free video editing app available on Android. It is made by ByteDance (the company behind TikTok) and has everything you need to create professional Instagram Reels — for absolutely zero cost. As a Setu Star, CapCut will be your best friend.
CapCut is a free video editing application. Think of it like a mini movie studio on your phone. You can:
CapCut is 100% free — no hidden charges, no watermark on your videos. Most professional Instagram creators use CapCut. If you learn one tool well, make it CapCut!
Follow these simple steps to get CapCut on your phone:
Video editing uses a lot of storage space on your phone. Make sure you have at least 2-3 GB of free space before you start editing. You can free up space by deleting old photos, moving WhatsApp media to a memory card, or clearing app cache in Settings → Storage.
When you open CapCut and start a new project, you will see three main areas on the screen:
This is the big area at the top of your screen. It shows you what your video looks like right now. You can tap the play button here to watch your video as you edit it. Always check the preview after making changes!
This is the long horizontal strip in the middle of the screen. It shows all your video clips laid out in order, left to right. Think of it like a train — each clip is a separate bogie. You can:
At the bottom of the screen, you will see a row of tool icons. These are your editing tools. The main ones you will use are:
| Tool | What It Does | When to Use It |
|---|---|---|
| Split | Cuts a clip into two pieces at the white line | When you want to remove a section from the middle of a clip |
| Speed | Makes the clip faster or slower | For time-lapse effects or dramatic slow-motion |
| Text | Adds words on top of your video | For titles, subtitles, step numbers, and key facts |
| Stickers | Adds emojis, arrows, and graphics | To make your video fun and point out things |
| Audio | Add music or sound effects | To add background music or trending audio |
| Filters | Changes the overall color look | To give your video a professional color grade |
| Effects | Special visual effects and animations | For transitions and making things pop |
| Overlay | Add another video or image on top | For adding your logo or picture-in-picture |
Don't try to learn all the tools at once! For your first few videos, focus only on: Split, Trim, Text, and Audio. Once you are comfortable with these four, start exploring the other tools.
Let's walk through editing a simple video from start to finish. We will make a 30-second reel about a local shop.
Instagram Reels are vertical (phone-shaped). Always set your project to 9:16 ratio. If you post a horizontal video, it will appear very small on people's feeds and get much less engagement.
Trimming means removing the beginning or end of a clip. Most raw clips have a few seconds of unwanted footage at the start and end (shaky camera, saying "ok start" etc.).
Your raw clip is 45 seconds long. The first 5 seconds show you walking up to the shop (boring). The last 8 seconds show the shop owner saying bye and the camera going down. You trim the left to remove the walk-up, and the right to remove the ending. Now you have a clean 32-second clip of the actual shop tour.
Sometimes the part you want to remove is in the middle of a clip. That's where the Split tool comes in.
You are interviewing a shop owner. At 0:12 they sneeze and laugh for 4 seconds, then continue talking normally. Split at 0:12, split again at 0:16, delete the middle sneeze section. Now the interview flows smoothly from one sentence to the next!
When two clips are placed side-by-side, there can be a sudden, jarring jump from one to the other. Transitions make this switch smooth and professional.
Keep it simple! The best transitions for Instagram Reels are: Dissolve (smooth fade), Slide Left (clean movement), and Zoom (energetic). Avoid overly fancy transitions — they look unprofessional and distract from your content.
| Transition | Best For | Duration |
|---|---|---|
| Dissolve / Fade | Interview cuts, calm transitions | 0.3–0.5s |
| Slide Left/Right | Changing scenes or locations | 0.3s |
| Zoom In | Energetic content, reveals | 0.2–0.3s |
| Cut (no transition) | Fast-paced content, tutorials | 0s |
| Glitch | Before/after reveals | 0.2s |
Changing the speed of clips is a powerful tool. It keeps viewers engaged and makes your content more dynamic.
Setting up a shop display: Film the whole 5-minute process at normal speed, then speed it up 4x in CapCut. A 5-minute setup becomes a satisfying 75-second time-lapse.
Walking through a market: Speed up 2x to show the energy and buzz of the market without taking too much time.
Cooking/making a product: Speed up repetitive steps (like stirring or kneading) at 3x to keep the viewer engaged.
Product reveal: Slow down the moment when the shop owner holds up their product — creates a dramatic "hero" moment.
Beautiful scenery: Slow down a pan across green fields or a village landscape.
Emotional moments: A happy customer's smile, a child looking at something in wonder.
The best reels mix speeds. Start with normal speed for the intro, speed up for the process/setup, and slow down for the final reveal. This creates a rhythm that keeps people watching. Professional creators call this "speed ramping."
Once you are happy with your edit, it's time to export (save) the final video.
If you close CapCut or switch to another app while exporting, the export may fail and you will have to start again. Keep the app open and let it finish. Also, make sure your phone has enough battery (at least 20%) before exporting.
Record 3 short video clips of anything around you (30 seconds each). Import them into CapCut, trim the beginning and end of each, add one transition between each clip, and export at 1080p. Share the result in your Setu Star WhatsApp group!
While CapCut is our primary recommendation, InShot is another excellent free video editor that many creators use. It's simpler than CapCut and great for quick edits when you're short on time.
Both apps are free and powerful, but they excel in different situations:
| Situation | Use CapCut | Use InShot |
|---|---|---|
| Full reel editing with multiple clips | ✅ Best choice | Can do, but slower |
| Quick trim and post | Can do | ✅ Faster for this |
| Adding fancy text animations | ✅ More options | Basic text only |
| Simple text overlay on one clip | Can do | ✅ Easier |
| Using trending effects | ✅ More effects | Limited effects |
| Resizing video for different platforms | Can do | ✅ Best canvas tool |
| Photo slideshows | Can do | ✅ Very easy |
| Adding music | ✅ Better music library | Good music library |
| When your phone has low storage | Needs more space | ✅ Lighter app |
Here is how to do a basic edit in InShot, from start to finish:
InShot adds a small watermark in the corner by default. You can remove it for free by watching a short ad. Just tap on the watermark in the preview and choose "Remove by watching ad." Always remove the watermark before posting!
Start with CapCut as your main editor — it's more powerful and most tutorials online use CapCut. Keep InShot installed as your backup for those days when you need a quick edit, your phone is running low on storage, or you just need to trim and post something fast.
Take one video clip from your gallery, import it into InShot, trim the first and last 3 seconds, add your name as text in the corner, and export. Time yourself — it should take less than 5 minutes!

Branding is what makes people recognize your content instantly. When someone is scrolling through Instagram and sees a reel, they should immediately know it's a KaryoSetu video — even before reading any text. Consistent branding builds trust and makes you look professional.
KaryoSetu has four official brand colors. You should use these colors in your text overlays, backgrounds, and any graphic elements.
| Color | Hex Code | When to Use | Feeling |
|---|---|---|---|
| KaryoSetu Green | #16a34a | Primary color for text, backgrounds, highlights | Growth, nature, rural India, trust |
| KaryoSetu Purple | #7C3AED | Accent color for emphasis, buttons, special highlights | Premium, modern, technology |
| Saffron | #ff9933 | Accent color for Indian identity, festive content | Indian pride, energy, warmth |
| White | #ffffff | Text on dark backgrounds, clean space | Clean, simple, easy to read |
Title text: White text with a green background bar behind it
Step numbers: Purple circle with white number inside
Key statistics: Saffron text to highlight important numbers
Subtitle text: White text with black outline (for visibility on any background)
The KaryoSetu logo should appear on every reel you create. This helps people recognize the brand and builds awareness.
Save the KaryoSetu logo image to your phone. In CapCut, tap "Overlay" → "Add overlay" → select the logo from your gallery. Resize it to be small, drag it to the corner, and extend its duration to cover the entire timeline. Done!
Do not stretch, squish, rotate, change the colors of, or add effects to the KaryoSetu logo. It must always appear exactly as provided — in its original proportions and colors. Altering the logo looks unprofessional and can confuse viewers. If the logo doesn't look right on a certain background, use the white version of the logo.
The fonts (text styles) you use in your reels matter more than you think. Here are the rules:
| Text Type | Font Style | Size | Color |
|---|---|---|---|
| Main Title | Bold / Extra Bold | Large (40-60pt in CapCut) | White or Green |
| Subtitles | Medium / Semi-Bold | Medium (24-32pt) | White with black outline |
| Step Numbers | Bold | Large (50pt+) | Purple or White in purple circle |
| Key Facts | Bold | Medium (28-36pt) | Saffron or Green |
| Credits/Tags | Regular | Small (18-24pt) | White at 70% opacity |
The most important branding rule is consistency. Every single reel you post should have the same look and feel:
When someone scrolls through your profile, all your reels should look like they belong together — like a collection, not a random mess.
Think about how Amul always uses the same cartoon girl, red background, and playful words. Or how Zomato always uses the same red color and funny tone. That's branding! When people see those colors and style, they instantly know the brand. You want the same thing for KaryoSetu content.
Look at your last 5 social media posts (from any platform). Are they consistent? Do they use the same fonts, colors, and style? Write down what you would change to make them look more branded. Now edit one of your practice videos from Chapter 1 to include proper branding: KaryoSetu logo in the corner, green/purple colors in text, and clean fonts.
Text is one of the most important elements of your reels. Studies show that over 70% of people watch Instagram Reels without sound. If your video has no text, those 70% of viewers won't understand your message at all!
This appears in the first 1–2 seconds of your reel. It's big, bold, and tells the viewer what the video is about.
"This Shop Earns ₹50,000/Month Using One App 🤯"
"How to List Your Shop on KaryoSetu in 5 Minutes"
"Village Business Tip #7 That Nobody Tells You"
"Meet the Woman Who Digitized Her Village Market"
When you're showing a process, use numbered steps as text overlays. This helps viewers follow along and makes the content structured.
"Step 1: Download KaryoSetu" (with a purple circle around the number)
"Step 2: Create Your Account" (same styling as step 1)
"Step 3: Add Your Shop" (same styling as step 1 and 2)
When your video mentions an important number, percentage, name, or fact, put it as text on screen. This makes it stick in the viewer's memory.
"₹50,000+ Monthly Revenue" (in saffron, large text)
"200+ Shops Already Listed" (in green, with a checkmark)
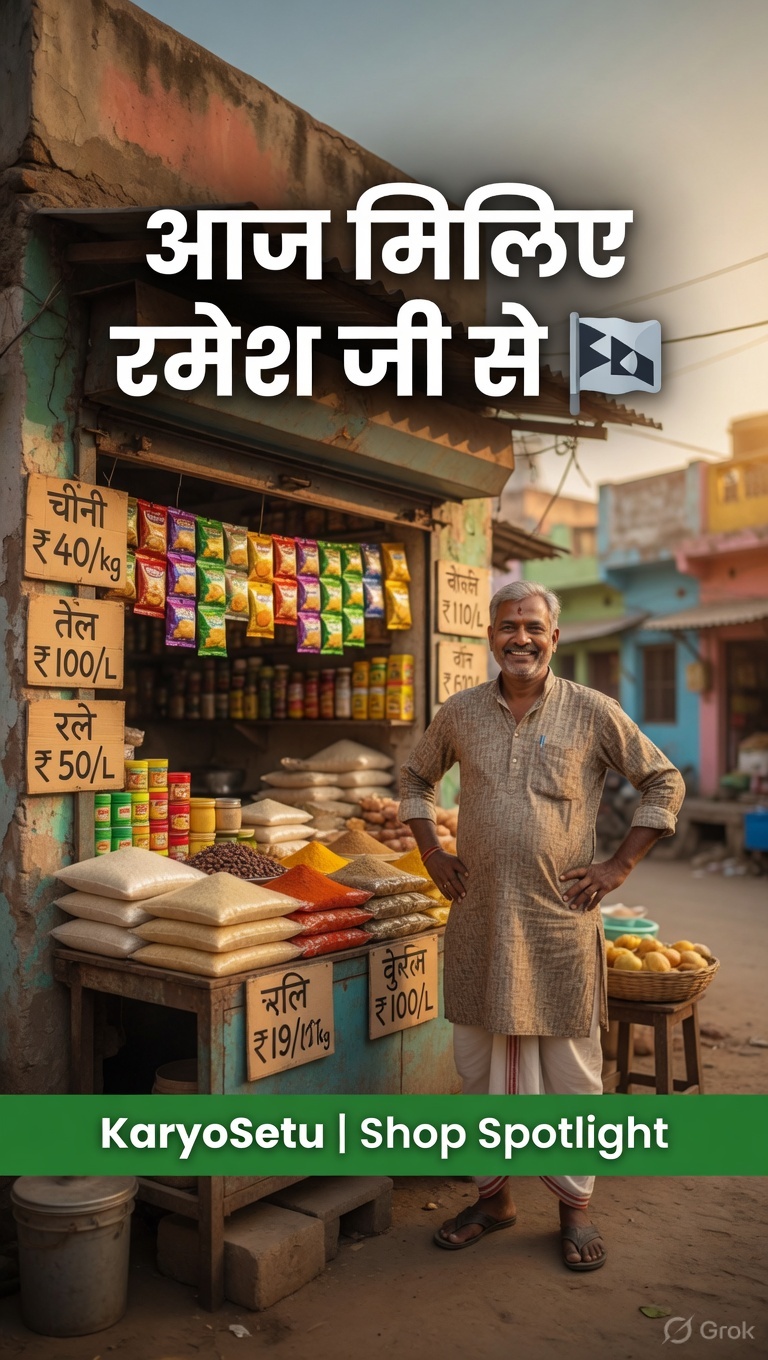
"Ramesh Patel, Grocery Store Owner" (clean white text at the bottom)
When someone is speaking in your video (interview, testimonial, voiceover), add subtitles so viewers can read what's being said.
Position: Bottom-center of the screen
Font: White text with black outline or a dark semi-transparent background bar
Size: Medium — readable but not overwhelming
Show 1–2 lines at a time. Sync each line to when the person actually says those words.
CapCut has an "Auto Captions" feature that can automatically generate subtitles from spoken words. Tap "Text" → "Auto Captions" → select the language (Hindi, Marathi, English, etc.) → tap "Create." It will automatically add subtitles! Review them for accuracy and fix any mistakes.
Stick to a maximum of 2 fonts per video. Here are the best font combinations:
| Combination | Title Font | Body/Subtitle Font | Best For |
|---|---|---|---|
| Clean & Modern | Montserrat Bold | Montserrat Regular | All content types |
| Bold & Friendly | Poppins Extra Bold | Poppins Regular | Tips, tutorials |
| Simple & Clear | Arial Black | Arial Regular | Testimonials, stories |
| Professional | Helvetica Bold | Helvetica Light | Business content |
The number one problem with text on video is readability. Your text must be easy to read on any background.
The safest text color combination that works on ANY background — whether light, dark, colorful, or moving — is white text with a black outline. This is the industry standard used by TV news channels, Netflix subtitles, and YouTube creators worldwide.
Select your text → tap "Style" → set text color to White → tap "Stroke" (or "Outline") → set stroke color to Black → set stroke width to about 3–4. Now your text will be readable on any background!
Another option is to put a semi-transparent colored bar behind your text:
Too much text: Don't put a paragraph on screen. Keep it to 5-8 words per text overlay. If you need more words, break it into multiple text overlays that appear one after another.
Too small: If you can't read the text on your phone from arm's length, it's too small. Make it bigger.
Bad placement: Don't put text at the very bottom (Instagram's caption covers it), in the top-left (Instagram puts the username there), or in the center blocking the main action.
Good placement zones: Top-center, middle-left, middle-right, lower-third (slightly above bottom)
Bad placement zones: Very bottom (hidden by caption), top-left (hidden by username), dead center (blocks the subject)
Safe zone: Imagine your video screen divided into a 3x3 grid. The center cell and the cell just below it are usually the best spots for title text.
Take any video clip and add all four types of text to it:
Make sure all text uses the white + black outline technique. Export and share in the training group.
The right music can make a good reel great. It sets the mood, keeps viewers watching, and — most importantly — using trending audio can push your reel to thousands of new viewers through Instagram's algorithm.
When you post a reel through Instagram itself, you can add music directly from Instagram's built-in library. This is the safest option because all music here is officially licensed.
CapCut has a large library of royalty-free music that you can use in your videos.
When you see a reel using music you like:
Every week, spend 10 minutes scrolling through the Instagram Reels tab. Save any trending audio that could work for your KaryoSetu content. Keep a collection of 10–15 saved audios ready to use. When a sound is trending, use it within 2–3 days for maximum algorithm boost!
Trending sounds are audio clips (songs, dialogues, or sound effects) that many creators are using at the same time. Instagram actively promotes reels that use trending audio.
A motivational Hindi song is trending this week with 50K+ reels. You make a "Shop Transformation" reel showing a local kirana store before and after listing on KaryoSetu. You use the trending song as background music, add your own text overlays explaining the story, and the reel gets 3x more views than usual because Instagram pushed it through the trending audio.
Getting the volume balance right is critical. Nothing is worse than a video where you can't hear the person speaking because the music is too loud.
| Audio Type | Volume Level | Why |
|---|---|---|
| Voice / Narration | 100% | This is your main content — it must be heard clearly |
| Background Music (with voice) | 15–20% | Sets the mood without drowning out the voice |
| Background Music (no voice) | 60–80% | When there's no talking, music can be louder |
| Sound Effects | 40–50% | Noticeable but not jarring |
| Trending Audio (as background) | 5–10% | Just enough for algorithm recognition, doesn't interfere |
Always listen to your final video with headphones AND without headphones before posting. Some phones have tiny speakers that make things sound different. Your video should sound good in both situations. Ask a friend to listen too — a fresh pair of ears catches problems you might miss.
Copyright means someone owns a song, and you cannot use it without permission. Using copyrighted music can get your reel removed, your account restricted, or in rare cases, your account banned.
Never download a Bollywood song or popular Hindi song from the internet and add it to your reel through CapCut. This can trigger a copyright strike. Instead, add the same song through Instagram's music feature AFTER uploading your edited video. Instagram has licenses for most popular songs when added through their platform.
Edit your video in CapCut with NO music or with CapCut's free music. Export the video. Then, when posting on Instagram, add the music through Instagram's own audio library. This is the safest approach and gives you access to trending sounds too!
Take a video where someone is talking. Add background music from CapCut's library. Practice setting the voice at 100% and music at 15%. Then try 30% music and notice how it starts to compete with the voice. Find the sweet spot where music adds atmosphere without drowning the speaker. Export and share in the training group.
Hashtags are like signboards on a highway. They tell Instagram what your content is about and help the right people find your reels. A good hashtag strategy can be the difference between 100 views and 10,000 views.
A hashtag is any word or phrase with the # symbol before it, like #KaryoSetu or #VillageBusiness. When you add hashtags to your post:
Imagine you own a shop in a market. Hashtags are like putting up signs outside your shop that say what you sell. Without signs, only people who already know your shop will come. With signs (#Groceries #FreshVegetables #DailyDeals), even strangers walking through the market can find you. The more specific and relevant your signs, the more likely the RIGHT customers will find you.
For maximum reach, every post should have a mix of three types of hashtags:
These are specific to KaryoSetu and the Setu Star program. They build brand awareness and help people find all KaryoSetu content in one place.
| Hashtag | Purpose | Use On |
|---|---|---|
| #KaryoSetu | Main brand hashtag | Every single post |
| #SetuStar | Creator program hashtag | Every single post |
| #KaryoSetuStar | Combined brand + creator tag | Every single post |
| #KaryoSetuApp | App-specific hashtag | Tutorial/demo posts |
| #KaryoSetuStory | Story/testimonial content | Success story posts |
These describe your content topic and target audience. They connect you with people interested in rural business, digital India, and local commerce.
| Category | Hashtags |
|---|---|
| Rural Business | #RuralBusiness #VillageBusiness #GaonKaKarobar #LocalShop #SmallBusiness |
| Digital India | #DigitalIndia #DigitalVillage #TechForGood #DigitalGaon #SmartVillage |
| Local Commerce | #LocalBusiness #ShopLocal #SupportLocal #AatmaNirbhar #VocalForLocal |
| Entrepreneurship | #YoungEntrepreneur #StartupIndia #BusinessGrowth #EntrepreneurLife |
| Community | #MyCommunity #MyVillage #CommunityFirst #Neighborhood #MeraGaon |
These change every week. They are general hashtags that are currently popular on Instagram and can give your reel extra visibility.
Every Monday morning, spend 10 minutes on Instagram's Explore page. Note down 5-10 trending hashtags that could relate to your content. Keep a running list in your phone's Notes app. Update it weekly. This simple habit will significantly increase your reach over time.
Instagram allows up to 30 hashtags per post, but research shows that 15–20 hashtags is the sweet spot for maximum reach. Here's how to split them:
| Type | How Many | Example |
|---|---|---|
| Brand Hashtags | 3–5 | #KaryoSetu #SetuStar #KaryoSetuStar |
| Niche Hashtags | 5–8 | #RuralBusiness #LocalShop #DigitalIndia #VocalForLocal #SmallBusiness |
| Trending Hashtags | 3–5 | #ReelsIndia #Trending #ExplorePage #MondayMotivation |
| Location Hashtags | 2–3 | #Maharashtra #Pune #MyCity |
| Total | 15–20 |
Don't use irrelevant hashtags. Using #Fashion or #Food on a business content reel will confuse the algorithm and actually hurt your reach. Every hashtag should relate to your content.
Don't use only mega-popular hashtags. Tags like #Love (2 billion posts) are so competitive that your reel will be buried in seconds. Mix large and small hashtags for the best results.
Don't use the exact same hashtags on every post. Instagram may flag this as spammy behavior. Rotate your hashtags — keep the brand ones constant but change the niche and trending ones.
To make your life easier, here are pre-made hashtag sets for each type of content you'll create as a Setu Star. Copy-paste and customize as needed!
#KaryoSetu #SetuStar #KaryoSetuStar #ShopSpotlight #LocalShop #SmallBusiness #VillageBusiness #SupportLocal #VocalForLocal #DigitalIndia #ShopLocal #RuralBusiness #EntrepreneurIndia #BusinessGrowth #MyVillage #ReelsIndia #Trending #ExplorePage
#KaryoSetu #SetuStar #KaryoSetuApp #HowTo #Tutorial #StepByStep #DigitalIndia #TechForGood #LearnWithMe #DigitalVillage #SmartPhone #AppTutorial #EasySteps #RuralTech #MobileApp #ReelsIndia #Trending #ExplorePage
#KaryoSetu #SetuStar #KaryoSetuStory #SuccessStory #Inspiration #SmallBusinessSuccess #VillageBusiness #RuralEntrepreneur #DreamBig #LocalHero #CommunityStory #DigitalIndia #BusinessInspiration #AatmaNirbhar #ReelsIndia #Trending
#KaryoSetu #SetuStar #BusinessTips #SmallBusinessTips #EntrepreneurTips #GrowYourBusiness #RuralBusiness #DigitalIndia #ShopSmarter #BusinessHacks #DailyTips #VillageBusiness #MoneyTips #GrowthMindset #ReelsIndia #Trending
#KaryoSetu #SetuStar #MyCommunity #MyVillage #MeraGaon #RuralIndia #IncredibleIndia #VillageLife #CommunityFirst #IndianCulture #LocalPride #Neighborhood #Tradition #Heritage #ReelsIndia #Trending #ExplorePage
Save these hashtag sets in your phone's Notes app. Create a separate note for each content type. When you're about to post, just open the note, copy the hashtags, and paste them into your Instagram caption. It takes 5 seconds instead of typing them out every time!
Create a custom hashtag set for a "Market Day" reel. Include:
Write them out and share in the training group. Let others review and suggest improvements!
You can create the best reel in the world, but if you post it at 3 AM when everyone is sleeping, nobody will see it. Posting at the right time is just as important as creating great content.
Your target audience is rural and semi-urban Indians — farmers, shop owners, students, and young people in villages and small towns. Their daily routine is different from city people. Understanding their schedule is key:
| Time | What They're Doing | Phone Usage |
|---|---|---|
| 5:00–6:30 AM | Waking up, morning chores, prayers | Low — too busy |
| 6:30–9:00 AM | Getting ready, tea break, before work/farm | Medium — scrolling while having tea |
| 9:00 AM–12:00 PM | Working, farming, school, college | Low — busy with work |
| 12:00–1:30 PM | Lunch break, resting | High — relaxing and scrolling |
| 1:30–5:00 PM | Afternoon work, school/college | Low to Medium |
| 5:00–6:00 PM | Finishing work, heading home | Medium — starting to relax |
| 6:00–8:00 PM | Evening free time, socializing, dinner prep | Highest — prime scrolling time! |
| 8:00–9:30 PM | After dinner, family time | High — watching TV and scrolling |
| 9:30–10:30 PM | Before sleeping, in bed | High — last scroll of the day |
| 10:30 PM–5:00 AM | Sleeping | Very Low |
Based on the audience schedule above, here are the four best windows to post your reels:
| Time Slot | Window | Rating | Why It Works |
|---|---|---|---|
| Morning | 7:00–9:00 AM | ⭐⭐⭐ Good | People scroll while having morning tea, before leaving for work or farm. Fresh feed means less competition. |
| Lunch | 12:00–1:00 PM | ⭐⭐⭐ Good | Lunch break = phone time. People are relaxing and more likely to engage with content. |
| Evening | 6:00–8:00 PM | ⭐⭐⭐⭐⭐ Best! | This is THE golden hour. Maximum people are free, relaxing, and actively scrolling. Post your most important reels here. |
| Night | 9:00–10:00 PM | ⭐⭐⭐⭐ Very Good | People are in bed scrolling before sleep. Great for stories, lighter content, and behind-the-scenes posts. |
If you can only remember one thing from this chapter, remember this: post your reels between 6:00 PM and 8:00 PM. This is when maximum people in rural India are on their phones. Your reel will get the most initial views, likes, and comments — which tells Instagram to show it to even more people.
Some days are better than others for posting. Here's a breakdown:
| Day | Engagement Level | Best Content Type | Notes |
|---|---|---|---|
| Monday | ⭐⭐⭐ Medium | Motivational content, weekly tips | People are starting their week — inspire them! |
| Tuesday | ⭐⭐⭐ Medium | Tutorials, how-to content | Good day for educational content |
| Wednesday | ⭐⭐⭐⭐ High | Shop spotlights, success stories | Mid-week engagement picks up |
| Thursday | ⭐⭐⭐⭐ High | Tips, interviews, testimonials | Consistent engagement |
| Friday | ⭐⭐⭐⭐⭐ Highest | Fun content, community posts | Weekend mood — people are relaxed and scrolling more |
| Saturday | ⭐⭐⭐⭐⭐ Highest | Market visits, behind-the-scenes | Weekly market day in many villages — perfect for shop content! |
| Sunday | ⭐⭐⭐⭐ High | Stories, cultural content, reflections | Holiday — people have more screen time |
Monday 7 PM: Motivational post — "Week start ki inspiration! This shop owner doubled his income..." #MondayMotivation
Wednesday 7 PM: Shop spotlight — "Meet Sunita Devi's amazing organic store in [Village Name]..."
Friday 7 PM: Fun/community reel — "POV: You visit the village market using KaryoSetu..."
Saturday 12 PM: Market day content — live from the weekly market!
Saturday 7 PM: Tutorial — "How to list your shop on KaryoSetu in 5 steps"
The times above are general guidelines. Your specific audience might be different. Instagram Insights can tell you exactly when YOUR followers are most active.
Instagram Insights only becomes useful after you have at least 100 followers and have been posting consistently for 2-3 weeks. Until then, stick with the recommended times in this chapter (especially 6-8 PM). Once you have enough data, fine-tune your schedule using Insights.
This week, post similar content at different times:
After 48 hours, check the views and engagement on each reel. Which time got the most views? Share your findings in the training group!
Instagram's Collab feature is one of the most powerful tools for growing your reach. When you collab post with @karyosetu, your reel appears on BOTH profiles — giving you access to all of @karyosetu's followers in addition to your own.
Collab (short for Collaboration) is an Instagram feature that lets two accounts share the same post. Here's what happens:
Let's say you have 500 followers and @karyosetu has 10,000 followers. Without collab, your reel reaches maybe 200–500 people. With collab, the same reel now reaches up to 10,000+ people because it appears on @karyosetu's page too. That's up to 20x more potential views from one simple step!
Follow these exact steps to create a collab post with @karyosetu:
Edit your video in CapCut as usual with branding, text, and music. Export the final video. Open Instagram and start creating a new Reel with your exported video.
If you want to add Instagram music (trending audio), add it now. Add any final filters or adjustments. Tap "Next" to go to the posting screen.
You'll see the screen where you write your caption, add location, etc. This is where we set up the collab.
After you post, @karyosetu will receive a notification about the collab invitation. Once the admin accepts it, the reel will appear on both profiles. Until then, it only appears on your profile.
After posting your collab reel, send a message in the Setu Star WhatsApp group letting the admin know you've posted a collab reel and it's pending acceptance. This helps the admin find and accept your request quickly. Don't send the same message repeatedly — one notification is enough!
| Benefit | How It Helps You |
|---|---|
| Increased Reach | Your reel reaches @karyosetu's entire follower base, potentially 10x–20x more views |
| Credibility | Being listed as co-author with @karyosetu makes you look official and trustworthy |
| Shared Engagement | All likes, comments, and views are combined — making the reel look more popular |
| Profile Visits | People who see the reel on @karyosetu's page may visit your profile and follow you |
| Portfolio | The collab reel stays on your profile, showing future viewers your partnership with the brand |
| Algorithm Boost | Instagram's algorithm tends to favor collab posts because they generate more engagement from two audiences |
Don't panic if your collab request isn't accepted immediately. Here's what can happen:
The admin hasn't seen it yet. Wait 24–48 hours. If still pending, send a polite reminder in the WhatsApp group.
This may happen if the content doesn't meet quality standards. Don't worry — it's not personal! Your reel still stays on your profile as a regular post. Review the feedback, improve your next video, and try collab again.
Sometimes Instagram has glitches and the collab invite doesn't appear. If the admin says they can't find the invite:
You can only invite ONE collaborator per post. Make sure the content is high quality before sending a collab invite. Don't spam collab invites — aim for 2–3 collab posts per week maximum. Your regular (non-collab) posts are important too!
Take one of the reels you created in previous chapters and go through the collab posting process:
Share the screenshot and the reel link in the training group.
Before you hit that "Share" button, run through this complete checklist. Think of it as your pre-flight check before takeoff. Skipping even one item can mean the difference between a mediocre post and a viral reel.
Go through each item before every single post:
| # | Check Item | Details |
|---|---|---|
| 1 | Video Quality | Is the video clear and not blurry? Good lighting? Stable camera (not too shaky)? |
| 2 | Aspect Ratio | Is it 9:16 (vertical)? Does it fill the full screen? |
| 3 | Video Length | Is it between 15–60 seconds? (30 seconds is ideal for beginners) |
| 4 | Branding — Logo | Is the KaryoSetu logo visible in the corner throughout the video? |
| 5 | Branding — Colors | Are you using brand colors (green, purple, saffron, white) in text overlays? |
| 6 | Title Text | Does the first 1–2 seconds have a strong hook title? |
| 7 | Text Readability | Can you read all text from arm's length? White + black outline? |
| 8 | Subtitles | If someone is speaking, are there subtitles? |
| 9 | Audio Balance | Voice at 100%, music at 15–20%? Does it pass the headphone test? |
| 10 | Transitions | Smooth transitions between clips? Nothing too flashy? |
| 11 | Export Quality | Exported at 1080p resolution, 30fps? |
Play the first 3 seconds of your reel. Would you stop scrolling to watch this? If not, your hook isn't strong enough. Go back and make the opening more attention-grabbing with a bold title, surprising visual, or intriguing question.
A great caption has four parts, always in this order:
| Part | What It Is | Length | Example |
|---|---|---|---|
| Hook | First line that grabs attention. Makes people tap "more." | 1 sentence | "This village shop owner earns ₹50,000/month — and her secret is just one app 👇" |
| Value | The main message, story, or information. | 2–4 sentences | "Sunita Devi from Rampura listed her organic products on KaryoSetu and now gets orders from 3 nearby villages. She started with just 5 products and now has 50+ listed." |
| CTA | Call to Action — tell people what to do next. | 1 sentence | "Download KaryoSetu now and list YOUR shop! Link in @karyosetu bio." |
| Hashtags | Your 15–20 hashtags from saved sets. | 15–20 tags | (Paste your saved hashtag set) |
Hook: "This ONE app changed Ramesh Bhai's kirana store forever 🏪"
Value: "Ramesh Bhai has been running his grocery store in Sangli for 15 years. Last year, he was struggling with competition from a new supermarket nearby. Then he listed all his products on KaryoSetu. Now customers order from home and pick up at his store. His monthly revenue increased by 40% in just 3 months!"
CTA: "Want the same growth for your shop? Download KaryoSetu today — link in @karyosetu bio! 📲"
Hashtags: #KaryoSetu #SetuStar #KaryoSetuStar #KaryoSetuStory #SuccessStory #KiranaStore #LocalShop #SmallBusiness #VillageBusiness #DigitalIndia #VocalForLocal #ShopLocal #RuralBusiness #GrowYourBusiness #BusinessGrowth #ReelsIndia #Trending #ExplorePage
Here are five ready-to-use caption templates. Just fill in the blanks!
Meet [Owner Name] from [Village/Town] — the person behind [Shop Name] 🏪
[Owner Name] has been running their [type of shop] for [number] years. What makes them special? [One unique thing about the shop]. They recently listed their shop on KaryoSetu and already [result/benefit they got].
Support local businesses! Follow @karyosetu to discover amazing shops near you 🙌
[Paste Shop Spotlight hashtag set]
How to [do something] in just [number] easy steps! 📱
Step 1: [First step]
Step 2: [Second step]
Step 3: [Third step]
It's that simple! [One sentence about the benefit of doing this].
Save this reel for later and share with someone who needs this! 💜
[Paste Tutorial hashtag set]
"[Powerful quote from the person]" — [Person's Name], [Village/Town] 💪
[2-3 sentences telling their story — the challenge they faced, what they did, and the result they achieved with KaryoSetu].
Every village has heroes like [Person's Name]. Download KaryoSetu and become one! Link in @karyosetu bio 📲
[Paste Success Story hashtag set]
[Number] tips every [type of person — shop owner / entrepreneur / student] should know 🧠
Tip 1: [First tip with brief explanation]
Tip 2: [Second tip with brief explanation]
Tip 3: [Third tip with brief explanation]
Which tip was most useful? Tell me in the comments! And follow @karyosetu for more business tips 👇
[Paste Tips hashtag set]
This is why I love [Village/Town Name] ❤️
[2-3 sentences describing what makes this place special — the market, the people, the culture, the food, the traditions]. [One sentence connecting it to KaryoSetu's mission — like "KaryoSetu is bringing this community into the digital world."]
Tag someone from [Village/Town Name] who should see this! 🙏
[Paste Community hashtag set]
To make your caption look clean on Instagram, leave a blank line between the hook, value, CTA, and hashtags. Instagram sometimes removes line breaks — to force a line break, put a period (.) on an empty line between paragraphs. Some creators type their captions in a notes app first to get the formatting right, then paste into Instagram.
Tagging is different from hashtags. Tags notify specific accounts and can increase your reel's visibility.
| Who | How to Tag | Why |
|---|---|---|
| @karyosetu | In caption AND on the video | Brand visibility, possible reshare, shows partnership |
| Featured shop/person | In caption AND on the video | They'll see it, share it, and their followers may see it |
| Your village/town page | In caption only | Local community pages often reshare relevant content |
| Other Setu Stars | In stories only | Build community, they may reshare your story |
Even if you're not doing a collab post, always tag @karyosetu in the caption (type @karyosetu) and on the video. This notifies the brand team, makes your content discoverable on the @karyosetu tagged page, and shows viewers that you're officially connected with the brand.
Adding a location tag helps your content appear in local search results. People in your area who search for that location on Instagram can discover your reels.
Best choice: Your exact village name (if available)
Second best: The nearest town or city
Third option: Your district or taluka
For market content: Tag the specific market location if it exists on Instagram
Always add a location — never skip it! It's free local visibility.
The cover image is the thumbnail that people see on your profile grid before they tap to watch. A good cover makes people want to watch; a bad cover makes people scroll past.
Before posting, look at your profile grid (your last 6-9 posts). Does the new cover image fit well with the others? A visually organized profile grid makes a great first impression on new visitors. Many people decide whether to follow you within 3 seconds of landing on your profile — make those seconds count!
Before you hit "Share," do this final 60-second review:
Before EVERY post, mentally go through: V-C-H-C-L-T-C-T
Video quality ✓
Caption (Hook + Value + CTA) ✓
Hashtags (15–20) ✓
Collab invite (@karyosetu) ✓
Location tag ✓
Tags (@karyosetu + featured person) ✓
Cover image ✓
Timing (6–8 PM ideal) ✓
Your work doesn't end when you hit "Share." The first 30–60 minutes after posting are critical for the algorithm.
When someone comments on your reel, don't just reply with "Thanks!" Ask them a question to keep the conversation going. More comments = more engagement = more reach. Example: If someone says "Nice video!", reply with "Thank you! Do you have a favorite local shop in your area? 😊"
Create and post one reel following every single step in this chapter:
Congratulations on completing Module 6! Let's recap what you've mastered:
Creating great content is a skill that improves with practice. Your first few reels might not be perfect — and that's completely okay! Every professional creator started exactly where you are now. Keep creating, keep learning, keep improving. You're already a Setu Star — now go shine! ⭐
Module 6: Editing & Posting — Setu Star Training Program
© KaryoSetu • For Internal Training Use Only
Next: Module 7 — Analytics & Growth