Tutorial reels are short Instagram videos — usually 30 to 60 seconds — that teach people how to do something on the KaryoSetu app. Instead of just telling people "download our app," you actually show them how to use it, step by step, right on your phone screen.
Tutorial reels are one of the most effective types of content you can create as a Setu Star. Here is why:
Think of tutorial reels like being a helpful elder brother or sister. You are not selling anything — you are teaching. When people feel helped, they naturally want to try the app themselves.
A good tutorial reel has these qualities:
Title: "How to Find a Plumber Near You in 10 Seconds"
Hook: "Need a plumber urgently? Let me show you the fastest way to find one."
What you show: Open KaryoSetu → tap on Services → select Plumber → show results with phone numbers
Closing: "That's it! No more asking 10 people. Just open KaryoSetu. Link in bio to download."
Why it works: Everyone needs a plumber sometimes. This solves a real problem. It is quick. It is impressive.
You might wonder: "How is a tutorial reel different from a normal reel?" Great question. Let us compare:
| Feature | Normal Reel | Tutorial Reel |
|---|---|---|
| Main goal | Entertain or inspire | Teach something useful |
| Content style | Talking to camera, dancing, skits | Screen recording + voice narration |
| Viewer action after watching | Like, maybe follow | Save, share, download the app |
| Trust level | Medium | Very high — they see real proof |
| Shelf life | Short — forgotten in days | Long — people search and find it later |
| Difficulty to make | Needs camera confidence | Easier — just record your screen |
If you are shy about being on camera, tutorial reels are perfect for you! You only need to show your phone screen and speak. No one needs to see your face. Many top tech creators never show their face.
When you make tutorial reels regularly, a beautiful cycle begins:
Ramesh, a Setu Star from Nagpur, posted 10 tutorial reels in his first month. One reel — "How to Search Using Voice" — got 15,000 views. People in his area started calling him "tech guru." He now has 2,000 followers and has helped 200+ people download KaryoSetu. All from simple screen recordings!
By the end of Module 4, you will be able to:
Let us get started!
Before moving on, think about this: What is one thing on your phone that you had to learn by watching someone else? Maybe it was how to use UPI payment, or how to set up WhatsApp. Remember how helpful that video was? That is exactly what you will create for KaryoSetu.
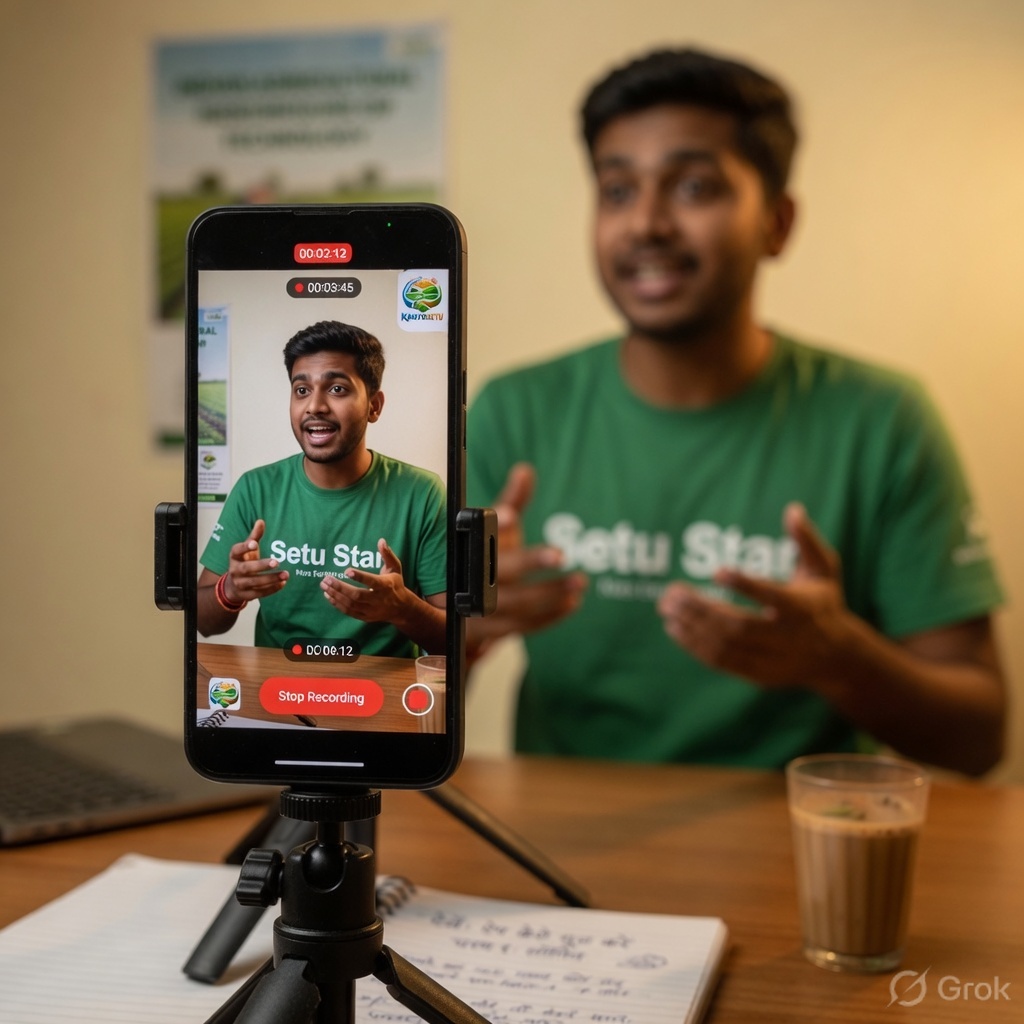
Before you can make tutorial reels, you need to know how to record your phone screen. This chapter will guide you step by step. Do not worry — it is very easy, and most phones already have this feature built in!
Most Android phones running Android 11 or newer have a built-in screen recorder. Here is how to find and use it:
Swipe down from the top of your screen with two fingers (or swipe down twice with one finger). You will see a panel with small square icons like Wi-Fi, Bluetooth, Flashlight, etc.
Look for an icon that says "Screen Record" or "Screen Recorder." It might look like a small video camera or a dot inside a circle.
If you do not see the Screen Record icon:
When you tap Screen Record for the first time, you will see options:
Tap "Start." You will see a 3-second countdown. After the countdown, everything on your screen is being recorded. A small red dot or timer will appear at the top of your screen.
When you are done, swipe down from the top and tap "Stop" on the recording notification. Your video is saved automatically in your phone's gallery.
This is very important! If "Show touches" is not available in the screen recorder options, you can enable it from: Settings → Developer Options → Show Touches → ON. This makes your tutorials much easier to follow because viewers can see exactly where you are tapping.
Different phone brands have slightly different steps. Here is a quick guide:
| Phone Brand | Where to Find Screen Recorder | Special Notes |
|---|---|---|
| Samsung | Quick Panel → Screen Recorder | Tap "Media sounds and mic" for audio |
| Xiaomi / Redmi / POCO | Control Center → Screen Recorder, or use the Screen Recorder app in your app drawer | Has a floating toolbar for easy control |
| Realme | Quick Settings → Screen Recording | Long-press the icon for settings |
| Oppo | Quick Settings → Screen Recording | Settings available in the notification |
| Vivo | Quick Settings → Screen Recording, or use S-capture | Some models: press Power + Volume Up for 3 seconds |
| OnePlus | Quick Settings → Screen Record | Similar to stock Android |
| Motorola | Quick Settings → Screen Record | Uses stock Android screen recorder |
If your phone does not have a built-in screen recorder (usually phones older than 2019 or running Android 10 or lower), do not worry! You can download a free app called AZ Screen Recorder.
| Setting | Recommended Value | Why |
|---|---|---|
| Resolution | 720p (1280×720) | Good quality, small file size |
| Frame rate | 30 FPS | Smooth video without huge files |
| Bit rate | 5 Mbps | Good balance of quality and size |
| Audio source | Microphone | Records your voice narration |
| Show touches | ON | Viewers can see your taps |
| Countdown timer | 3 seconds | Gives you time to prepare |
Screen recordings take up space on your phone. A 60-second recording at 720p takes about 30-50 MB. Before you start recording, make sure you have at least 1 GB of free space. To check: Settings → Storage. If space is low, delete old photos/videos or move them to Google Photos. Running out of space during recording will corrupt your video!
You might think "higher resolution = better video." But for Instagram Reels, 720p is enough. Here is why:
Before making your first tutorial reel, do a test recording! Record yourself opening any app for 15 seconds, then watch it back. Check: Can you hear your voice clearly? Can you see the screen taps? Is the video smooth? Fix any issues before making real content.
Your voice is what makes your tutorial special. Without narration, viewers just see a screen moving and do not understand what is happening. Here is how to make sure your microphone is working:
| Problem | Solution |
|---|---|
| Voice sounds very soft/quiet | Hold the phone closer to your mouth (15-20 cm away). Speak a little louder. |
| Background noise (fan, traffic) | Record in a quiet room. Close windows. Turn off the fan for 60 seconds. |
| Voice sounds muffled | Make sure your finger is not covering the microphone hole. Check where your phone's mic is (usually at the bottom). |
| No audio at all | Check if you selected "Microphone" in recording settings. Also check app permissions: Settings → Apps → Screen Recorder → Permissions → Microphone → Allow. |
| Echo or robotic sound | Do not record near walls or in very small rooms. Remove any phone case that covers the mic. |
Before recording, turn on Do Not Disturb (DND) mode! Nothing ruins a tutorial reel faster than a WhatsApp message popping up in the middle of your screen recording. Also, personal notifications might show private information. Swipe down → tap the DND icon (usually a circle with a line through it).
Before every tutorial reel recording, go through this checklist:
| # | Check | Done? |
|---|---|---|
| 1 | Phone charged above 50% | ☐ |
| 2 | At least 1 GB free storage | ☐ |
| 3 | Do Not Disturb mode ON | ☐ |
| 4 | Screen brightness at 70-80% | ☐ |
| 5 | Show Touches enabled | ☐ |
| 6 | Microphone audio selected | ☐ |
| 7 | Resolution set to 720p | ☐ |
| 8 | Room is quiet | ☐ |
| 9 | KaryoSetu app is logged in and ready | ☐ |
| 10 | Script/notes ready nearby | ☐ |
You do not need to think up ideas from scratch. We have prepared 15 tutorial topics that cover the most useful features of KaryoSetu. Each topic is something people in your area will find helpful. Start with any 5 that feel easiest to you, then work your way through the rest!
| # | Tutorial Topic | What to Show on Screen | Difficulty |
|---|---|---|---|
| 1 | How to Download KaryoSetu | Open Play Store → search "KaryoSetu" → tap Install → show the app on home screen after installation | ⭐ Easy |
| 2 | How to Create an Account | Open app → tap Sign Up → enter phone number → receive OTP → verify → set up profile name and village | ⭐ Easy |
| 3 | How to Search Using Voice | Open app → tap search bar → tap the microphone icon → speak your query (e.g. "plumber near me") → show results | ⭐⭐ Medium |
| 4 | How to Create a Listing Using Voice | Open app → tap "+" or Create → tap voice input → speak your listing details → show the auto-filled form → tap Submit | ⭐⭐⭐ Advanced |
| 5 | How to Add Photos to a Listing | Open a listing draft → tap "Add Photos" → take photo or choose from gallery → crop if needed → tap Upload | ⭐ Easy |
| 6 | How to Browse Categories | Open app → show the categories on home screen → tap a few categories (Jobs, Services, Products) → show listings inside each | ⭐ Easy |
| 7 | How to Contact a Seller | Open any listing → tap "Contact Seller" → show call and chat options → demonstrate sending a message | ⭐ Easy |
| 8 | How to Use the Samjho AI Assistant | Open app → find the Samjho AI chat icon → tap it → type or speak a question → show the AI response | ⭐⭐ Medium |
| 9 | How to Change Language | Open app → go to Settings or Profile → tap Language → show options (Hindi, Marathi, English, etc.) → select one → show the app changing | ⭐ Easy |
| 10 | How to Share a Listing on WhatsApp | Open any listing → tap the Share icon → select WhatsApp → choose a contact or group → send | ⭐ Easy |
| 11 | How to Create a Family Account | Open app → go to Profile → tap "Family" → tap "Add Family Member" → enter their name and phone → show the linked profiles | ⭐⭐ Medium |
| 12 | How to Find Services Near You | Open app → tap Services → enable location → show nearby services with distances → tap one for details | ⭐⭐ Medium |
| 13 | How to Use the Referral System | Open app → go to Profile → tap "Refer & Earn" → copy your referral link → share it → show the rewards screen | ⭐⭐ Medium |
| 14 | How to Check Government Schemes | Open app → find "Sarkari Yojana" section → browse categories → tap a scheme → show eligibility and application details | ⭐⭐ Medium |
| 15 | How to Book a Ride | Open app → tap Transport or Ride → enter destination → see available rides → tap Book → show confirmation | ⭐⭐ Medium |
If this is your first time making tutorial reels, start with the ⭐ Easy tutorials (topics 1, 2, 5, 6, 7, 9, 10). These are simple, short, and hard to get wrong. Once you are comfortable, move to the ⭐⭐ Medium and ⭐⭐⭐ Advanced topics.
We chose these 15 topics carefully based on:
You can also think of these tutorials in groups. This helps you plan a series of related reels:
| Theme | Tutorial Numbers | Series Name Idea |
|---|---|---|
| Getting Started | 1, 2, 9 | "KaryoSetu Basics" Series |
| Finding Things | 3, 6, 12 | "Find Anything" Series |
| Creating & Selling | 4, 5, 10 | "Sell on KaryoSetu" Series |
| Smart Features | 3, 4, 8 | "Smart App Tricks" Series |
| Social & Family | 7, 11, 13 | "Connect with KaryoSetu" Series |
| Useful Services | 12, 14, 15 | "Life Made Easy" Series |
Look at the list of 15 tutorials above. Now pick the 5 topics you want to make first. Write them down in order. Here is how to choose:
Once you have your list, you are ready to learn the perfect format for making these reels in the next chapter!
Sunita, a Setu Star from a village near Pune, chose these 5 for her first week:
This was a smart choice because the first 3 reels form a natural "Getting Started" series, and the voice search reel gives that extra excitement!
Every great tutorial reel follows the same proven format. Think of it like a recipe — once you know the steps, you can make any tutorial. The best length for a tutorial reel is 45-60 seconds. Not too short (people cannot follow), not too long (people lose interest).
Every tutorial reel has exactly 5 parts. Here is the breakdown:
| Part | Time | Duration | What You Do | What Viewers Feel |
|---|---|---|---|---|
| 1. Hook | 0:00 – 0:05 | 5 seconds | Ask a question or state a surprising fact | "Oh, I want to know this!" |
| 2. Problem | 0:05 – 0:10 | 5 seconds | Describe the common problem people face | "Yes, I face this problem too!" |
| 3. Solution Intro | 0:10 – 0:15 | 5 seconds | Say "Let me show you how to fix this" | "Show me! Show me!" |
| 4. Step-by-Step Demo | 0:15 – 0:50 | 35 seconds | Screen recording with voice narration | "Oh wow, that is easy!" |
| 5. Call to Action | 0:50 – 1:00 | 10 seconds | Tell viewers to download the app | "I should try this app!" |
The hook is the most important part. If your first 3 seconds are boring, people will scroll away. You need to grab their attention instantly.
Download tutorial: "Everyone is talking about this app. Let me show you how to get it."
Voice search: "What if I told you this app understands Hindi? Watch this!"
Government schemes: "Are you missing out on government schemes you qualify for? Check this."
Share on WhatsApp: "Found something great on KaryoSetu? Here's how to share it in 5 seconds."
After the hook, quickly describe the problem. This makes viewers think "Yes! I face this exact problem!"
Now bridge from the problem to the solution. Keep it short and confident.
This is the main body of your tutorial. Here you show the actual screen recording with your voice explaining each step.
For every tap you make on screen, say what you are tapping and why. Example: "Now I tap on 'Services' — this shows me all the services available near my area." This simple technique makes your tutorial clear even for people who are not tech-savvy.
Always end your reel by telling viewers what to do next. Never just stop — give them a clear direction.
[0:00-0:05] "What if I told you this app understands Hindi? Watch what happens when I speak to it."
[0:05-0:10] "Finding things online is hard when you have to type. Especially in English. But what if you could just speak?"
[0:10-0:15] "Let me show you the magic of KaryoSetu's voice search. It is so simple."
[0:15-0:20] "Step 1: Open the KaryoSetu app. You will see the home screen like this."
[0:20-0:25] "Step 2: Tap on the search bar at the top. See this microphone icon? Tap on it."
[0:25-0:35] "Step 3: Now speak in Hindi. I will say 'mujhe paas mein plumber chahiye.' Watch — it understood perfectly!"
[0:35-0:45] "Step 4: Look at these results! Plumbers near my area with phone numbers and ratings. I can call any of them right now."
[0:45-0:55] "That is it! No typing needed. Just speak and KaryoSetu finds what you need."
[0:55-1:00] "Download KaryoSetu — link in my bio! Follow for more tips."
Pick one tutorial topic from your list of 5. Now write a hook for it using one of the formulas above. Remember, your hook should be:
Write it down. Read it out loud. Does it sound natural and exciting? If yes, great! If not, try another formula.
Your voice is your biggest tool in a tutorial reel. The screen recording shows what is happening, but your voice explains why and how. A clear, friendly voice can turn a confusing screen recording into an easy-to-follow tutorial.
When you are nervous, you tend to speak fast. Resist this! Your viewers may be seeing the app for the first time. They need time to understand each step. Aim for a relaxed, steady pace — like you are explaining something to your younger sibling while having chai together.
A good test: record yourself reading this sentence out loud — "Open the app, tap on search, then tap the microphone button." It should take about 4-5 seconds to say this. If you said it in under 3 seconds, you are speaking too fast!
Avoid technical jargon. Many of your viewers may not be familiar with technology words. Use everyday language instead.
| ❌ Do Not Say | ✅ Say This Instead |
|---|---|
| "Navigate to the interface" | "Go to the main screen" |
| "Access the settings module" | "Open settings" |
| "Input your credentials" | "Type your phone number" |
| "The application will render results" | "The app will show you results" |
| "Enable the feature toggle" | "Turn this on" |
| "Authenticate your account" | "Confirm your phone number" |
| "Configure your preferences" | "Set up what you like" |
| "Interface element" | "Button" or "icon" |
Imagine your best friend just got a new phone and asked you "Yaar, how do I use this app?" That is how you should talk. Friendly. Patient. Encouraging.
❌ Robotic: "Step one. Open the application. Step two. Navigate to the search function. Step three. Initiate voice input."
✅ Friendly: "First, open KaryoSetu — you will see this nice home screen. Now tap on search at the top. See that little microphone icon? Tap on it — this is where the magic happens!"
Background noise kills the quality of your narration. Here are tips for a quiet recording:
Your tone matters as much as your words. Sound excited about showing this feature! Sound happy when the result appears. Your enthusiasm is contagious.
Never record your first attempt. Always practice.
Hold your phone in one hand and practice your narration while looking in a mirror. This may feel silly, but it helps you notice if you are mumbling, speaking too softly, or looking tense. A relaxed face = a relaxed voice.
| ✅ Do This | ❌ Avoid This |
|---|---|
| Speak at a steady, medium pace | Rushing through steps |
| Pause 1-2 seconds between steps | Talking non-stop without breaks |
| Say "Step 1, Step 2, Step 3" | Saying vague things like "now do this, then this" |
| Describe what viewers see | Assuming viewers know what icons mean |
| Sound excited and encouraging | Sounding bored or reading mechanically |
| Use everyday simple words | Using English tech jargon |
| Record in a quiet place | Recording with TV/fan/traffic noise |
| Practice before recording | Trying to get it right on the first attempt |
"Hey everyone! Today I am going to show you something amazing. You can create a listing on KaryoSetu and sell your products — and you do not even need a computer!"
"Step 1: Open the KaryoSetu app. See this plus icon at the bottom? Tap on it."
"Step 2: Now you will see options. Tap on 'Create Listing.' Easy, right?"
"Step 3: Here is the fun part — see this microphone button? Tap on it and just speak! Tell it what you want to sell. I will say: 'I want to sell fresh tomatoes, 20 rupees per kilo, from Nashik.'"
"Look at that! The app understood everything and filled in all the details automatically. The title, price, location — everything!"
"Step 4: Check if the details are correct. You can edit anything by tapping on it. Looking good? Tap 'Submit!'"
"And done! Your listing is now live. People near you can see it and contact you. How easy was that?"
"Try it yourself — download KaryoSetu from the link in my bio. Follow me for more tips!"
Read the sample narration above out loud. Time yourself — it should take about 50-60 seconds. Now try it again, but this time:
1. "Umm" and "Aaa" fillers. If you catch yourself saying "umm" a lot, pause silently instead. A brief silence is better than filler sounds.
2. Forgetting to breathe. Take natural breaths between steps. Do not try to say everything in one breath.
3. Apologizing too much. Do not say "Sorry, let me try again" on camera. If you make a mistake, stop recording and start over.
Writing a script might feel hard at first, but we have made it easy for you. Below are complete, word-by-word scripts for the first 5 tutorial topics. You can use these exactly as they are, or change the words to match your own style. For each script, we also tell you exactly what to show on screen at each moment.
Print the script or write it on a piece of paper. Keep it near you while recording. Glance at it between steps. After 2-3 practice runs, you will remember most of it naturally. You do not need to memorize word-for-word — just get the flow right.
| Time | What You Say (Narration) | What You Show (Screen) |
|---|---|---|
| 0:00-0:05 | "Everyone is talking about this new app for villages. Let me show you how to get it in 30 seconds." | Show your phone home screen |
| 0:05-0:10 | "So many people are asking me 'How do I download KaryoSetu?' It is so easy." | Still on home screen, then open Play Store |
| 0:10-0:15 | "Just follow these simple steps with me." | Play Store is open, tap on search bar |
| 0:15-0:22 | "Step 1: Open the Google Play Store. Now tap on the search bar at the top and type 'KaryoSetu'." | Type "KaryoSetu" in search bar, show results |
| 0:22-0:30 | "Step 2: You will see the KaryoSetu app with its purple logo. Tap on it. Now tap the green 'Install' button." | Tap on the app result, then tap Install |
| 0:30-0:38 | "Step 3: Wait for it to download. It is a small app so it will be quick even on slow internet." | Show the download progress bar |
| 0:38-0:45 | "Done! See? The app is now on your phone. Tap 'Open' to start." | Show "Open" button, tap it, show the app opening |
| 0:45-0:55 | "Welcome to KaryoSetu! From here you can find jobs, services, buy and sell products, and so much more." | Show the app home screen, scroll a little |
| 0:55-1:00 | "Link is also in my bio if you want to download directly. Follow me for more tips!" | Show home screen, point up gesture |
"Everyone is talking about this new app for villages. Let me show you how to get it in 30 seconds. So many people are asking me 'How do I download KaryoSetu?' It is so easy. Just follow these simple steps with me. Step 1: Open the Google Play Store. Now tap on the search bar at the top and type 'KaryoSetu.' Step 2: You will see the KaryoSetu app with its purple logo. Tap on it. Now tap the green 'Install' button. Step 3: Wait for it to download. It is a small app so it will be quick even on slow internet. Done! See? The app is now on your phone. Tap 'Open' to start. Welcome to KaryoSetu! From here you can find jobs, services, buy and sell products, and so much more. Link is also in my bio if you want to download directly. Follow me for more tips!"
| Time | What You Say (Narration) | What You Show (Screen) |
|---|---|---|
| 0:00-0:05 | "Just downloaded KaryoSetu? Let me show you how to set up your account in under a minute." | Show KaryoSetu app icon on home screen |
| 0:05-0:10 | "Creating an account is the first step. And trust me, it is the easiest thing you will do today." | Open the app, show the login/signup screen |
| 0:10-0:15 | "Follow along — I will go step by step." | Show the Sign Up button |
| 0:15-0:22 | "Step 1: Open KaryoSetu and tap 'Sign Up.' You will see a form asking for your phone number." | Tap Sign Up, show the phone number field |
| 0:22-0:30 | "Step 2: Enter your phone number. This is the number you use for WhatsApp — easy to remember! Now tap 'Send OTP.'" | Type phone number, tap Send OTP |
| 0:30-0:38 | "Step 3: You will get a message on your phone with a code. Enter that code here. The app might even fill it in automatically!" | Show OTP entry screen, enter the code |
| 0:38-0:48 | "Step 4: Now just enter your name and your village or city. This helps people near you find your listings." | Fill in name and location fields, tap Continue |
| 0:48-0:55 | "And you are done! Welcome to KaryoSetu! See your profile is all set up." | Show the completed profile / home screen |
| 0:55-1:00 | "Try it now — download link in my bio! And follow me for the next tutorial." | Show home screen |
"Just downloaded KaryoSetu? Let me show you how to set up your account in under a minute. Creating an account is the first step. And trust me, it is the easiest thing you will do today. Follow along — I will go step by step. Step 1: Open KaryoSetu and tap 'Sign Up.' You will see a form asking for your phone number. Step 2: Enter your phone number. This is the number you use for WhatsApp — easy to remember! Now tap 'Send OTP.' Step 3: You will get a message on your phone with a code. Enter that code here. The app might even fill it in automatically! Step 4: Now just enter your name and your village or city. This helps people near you find your listings. And you are done! Welcome to KaryoSetu! See your profile is all set up. Try it now — download link in my bio! And follow me for the next tutorial."
| Time | What You Say (Narration) | What You Show (Screen) |
|---|---|---|
| 0:00-0:05 | "What if I told you this app understands your voice — in Hindi, Marathi, or English? Watch this!" | Show KaryoSetu home screen |
| 0:05-0:10 | "Typing on phone is slow and annoying, right? Especially when you need something urgently." | Show the search bar, maybe type a letter slowly to show it is tedious |
| 0:10-0:15 | "KaryoSetu has an amazing voice search. Let me show you how it works." | Clear the search bar, point to the microphone icon |
| 0:15-0:22 | "Step 1: Open the app and tap on the search bar. See this microphone icon on the right? Tap on it." | Tap search bar, then tap microphone icon |
| 0:22-0:30 | "Step 2: Now just speak. I will say 'mujhe paas mein electrician chahiye.' Watch what happens!" | Speak into the phone, show the voice being recognized |
| 0:30-0:40 | "Wow! Look at that. It understood perfectly! And here are electricians near my area with their phone numbers, ratings, everything." | Show the search results with listings |
| 0:40-0:48 | "Step 3: Tap on any result to see full details. You can call them directly from here. No need to search anywhere else!" | Tap on one result, show details, show call button |
| 0:48-0:55 | "Voice search works in Hindi, Marathi, English — whichever language you are comfortable with." | Go back to search, show microphone icon again |
| 0:55-1:00 | "Try it yourself! Download KaryoSetu — link in my bio." | Show home screen |
"What if I told you this app understands your voice — in Hindi, Marathi, or English? Watch this! Typing on phone is slow and annoying, right? Especially when you need something urgently. KaryoSetu has an amazing voice search. Let me show you how it works. Step 1: Open the app and tap on the search bar. See this microphone icon on the right? Tap on it. Step 2: Now just speak. I will say 'mujhe paas mein electrician chahiye.' Watch what happens! Wow! Look at that. It understood perfectly! And here are electricians near my area with their phone numbers, ratings, everything. Step 3: Tap on any result to see full details. You can call them directly from here. No need to search anywhere else! Voice search works in Hindi, Marathi, English — whichever language you are comfortable with. Try it yourself! Download KaryoSetu — link in my bio."
| Time | What You Say (Narration) | What You Show (Screen) |
|---|---|---|
| 0:00-0:05 | "Want to sell something online but hate typing? I am about to blow your mind." | Show phone home screen with KaryoSetu icon |
| 0:05-0:10 | "Creating a listing online usually means filling long forms. But not on KaryoSetu." | Open KaryoSetu, show home screen |
| 0:10-0:15 | "You can create a complete listing just by speaking. Watch this — it is like magic." | Navigate to the Create / Plus button |
| 0:15-0:22 | "Step 1: Tap the plus button at the bottom. Then tap 'Create Listing.'" | Tap plus icon, tap Create Listing |
| 0:22-0:30 | "Step 2: See the microphone icon? Tap on it. Now just speak naturally. I will say: 'Main fresh tamatar bechna chahta hoon, 30 rupaye kilo, Nashik se.'" | Tap microphone, speak the listing details |
| 0:30-0:42 | "Look at this! The app understood everything. Title — Fresh Tomatoes. Price — 30 rupees per kilo. Location — Nashik. It filled the entire form automatically!" | Show the auto-filled form with all fields populated |
| 0:42-0:48 | "Step 3: Check the details. Everything correct? Tap 'Submit.' And your listing is live!" | Review form, tap Submit, show success screen |
| 0:48-0:55 | "No typing. No filling forms. Just speak and sell. This is the future!" | Show the published listing |
| 0:55-1:00 | "Download KaryoSetu and try this yourself. Link in bio!" | Show home screen |
"Want to sell something online but hate typing? I am about to blow your mind. Creating a listing online usually means filling long forms. But not on KaryoSetu. You can create a complete listing just by speaking. Watch this — it is like magic. Step 1: Tap the plus button at the bottom. Then tap 'Create Listing.' Step 2: See the microphone icon? Tap on it. Now just speak naturally. I will say: 'Main fresh tamatar bechna chahta hoon, 30 rupaye kilo, Nashik se.' Look at this! The app understood everything. Title — Fresh Tomatoes. Price — 30 rupees per kilo. Location — Nashik. It filled the entire form automatically! Step 3: Check the details. Everything correct? Tap 'Submit.' And your listing is live! No typing. No filling forms. Just speak and sell. This is the future! Download KaryoSetu and try this yourself. Link in bio!"
| Time | What You Say (Narration) | What You Show (Screen) |
|---|---|---|
| 0:00-0:05 | "Your listing will get 3 times more views if you add photos. Here is how to do it." | Show KaryoSetu app opening |
| 0:05-0:10 | "A listing without photos is like a shop without a signboard — no one stops to look." | Show a listing without photos (if possible) to illustrate |
| 0:10-0:15 | "Adding photos is very easy. Let me show you how." | Navigate to Create Listing or edit an existing one |
| 0:15-0:22 | "Step 1: When creating or editing a listing, you will see an 'Add Photos' button. Tap on it." | Show the listing form, tap Add Photos |
| 0:22-0:30 | "Step 2: You have two options — take a new photo with your camera, or choose from your gallery. I will take a fresh photo." | Show Camera/Gallery options, tap Camera |
| 0:30-0:38 | "Step 3: Take a clear photo of your product. Make sure there is good light. Tap the button to capture." | Show camera screen, take a photo |
| 0:38-0:45 | "Step 4: You can crop or rotate the photo if needed. Looking good? Tap 'Done.' You can add up to 5 photos!" | Show crop/edit screen, tap Done, show the photo attached |
| 0:45-0:52 | "See how much better the listing looks now with a photo? People can see exactly what you are selling." | Show the listing with photo vs. without |
| 0:52-1:00 | "Always add at least 2-3 photos for best results. Download KaryoSetu — link in bio!" | Show completed listing, then home screen |
"Your listing will get 3 times more views if you add photos. Here is how to do it. A listing without photos is like a shop without a signboard — no one stops to look. Adding photos is very easy. Let me show you how. Step 1: When creating or editing a listing, you will see an 'Add Photos' button. Tap on it. Step 2: You have two options — take a new photo with your camera, or choose from your gallery. I will take a fresh photo. Step 3: Take a clear photo of your product. Make sure there is good light. Tap the button to capture. Step 4: You can crop or rotate the photo if needed. Looking good? Tap 'Done.' You can add up to 5 photos! See how much better the listing looks now with a photo? People can see exactly what you are selling. Always add at least 2-3 photos for best results. Download KaryoSetu — link in bio!"
These scripts are a starting point. Feel free to change the words to match how you naturally speak. If you normally say "Dekho" instead of "Look at this," use "Dekho." Authenticity beats perfection. Your viewers will connect more if you sound like yourself, not like you are reading a script.
Choose Script 1 (How to Download KaryoSetu) — it is the easiest one. Now:
Every Setu Star needs one "hero reel" — one video that is so impressive, so mind-blowing, that people cannot help but share it. For KaryoSetu creators, the ultimate hero reel is the "Create a Listing Using Voice" tutorial. This chapter gives you everything you need to make this reel perfect.
Think about it from a viewer's perspective. They see someone open an app, speak in Hindi for 10 seconds, and the app creates a complete listing — title, price, category, location — all filled in automatically. That is like magic! Here is why this reel stands out:
The key to this reel going viral is the WOW MOMENT — the exact second when the form auto-fills. Build up to it with excitement: "Now watch what happens..." Then when it fills in, react with genuine surprise: "Dekho! It understood everything!" Your excitement will be contagious.
Here is the detailed plan for every second of this reel. Follow this exactly for maximum impact.
| Shot | Time | Camera/Screen | Narration | Mood/Energy |
|---|---|---|---|---|
| 1 | 0:00-0:03 | Text on screen: "You can create a listing without typing a SINGLE WORD 🤯" | "Watch this carefully." | Mysterious, intriguing |
| 2 | 0:03-0:07 | Screen recording: open KaryoSetu app | "I am going to create a listing on KaryoSetu. But I am not going to type anything." | Confident, building up |
| 3 | 0:07-0:12 | Tap the plus/create icon, then tap Create Listing | "Step 1: I tap create. Step 2: I tap 'Create Listing.' Now here is the magic part." | Building excitement |
| 4 | 0:12-0:16 | Show the empty form, then tap the microphone icon | "See this microphone button? I am going to just SPEAK and the app will do everything." | Suspenseful |
| 5 | 0:16-0:26 | Show the voice recording animation, speak clearly | "Main apne khet ke fresh tamatar bechna chahta hoon. Price 25 rupaye kilo. Location Nashik, Maharashtra." | Clear, deliberate |
| 6 | 0:26-0:35 | Show the form filling in automatically — this is the WOW MOMENT | "LOOK AT THIS! It understood everything! Title — Fresh Tomatoes. Price — 25 rupees. Category — Agriculture. Location — Nashik. Everything filled in perfectly!" | Excited, amazed! |
| 7 | 0:35-0:42 | Scroll through the filled form, point out each field | "I did not type a single letter. I just spoke in Hindi and the app understood. This is unbelievable." | Impressed, genuine |
| 8 | 0:42-0:48 | Tap Submit, show success message | "Now I just tap Submit and my listing is live. People near me can see it and buy my tomatoes." | Satisfied, proud |
| 9 | 0:48-0:55 | Show the published listing with all details | "No computer needed. No typing needed. Just your voice. This app is made for people like us." | Empowering, emotional |
| 10 | 0:55-1:00 | Text overlay: "Download KaryoSetu — Link in Bio 👇" | "Download KaryoSetu today. Link in my bio. Share this with someone who sells products!" | Call to action, urgent |
"Watch this carefully. I am going to create a listing on KaryoSetu. But I am not going to type anything."
"Step 1: I tap create. Step 2: I tap 'Create Listing.' Now here is the magic part."
"See this microphone button? I am going to just SPEAK and the app will do everything."
"Main apne khet ke fresh tamatar bechna chahta hoon. Price 25 rupaye kilo. Location Nashik, Maharashtra."
"LOOK AT THIS! It understood everything! Title — Fresh Tomatoes. Price — 25 rupees. Category — Agriculture. Location — Nashik. Everything filled in perfectly!"
"I did not type a single letter. I just spoke in Hindi and the app understood. This is unbelievable."
"Now I just tap Submit and my listing is live. People near me can see it and buy my tomatoes."
"No computer needed. No typing needed. Just your voice. This app is made for people like us."
"Download KaryoSetu today. Link in my bio. Share this with someone who sells products!"
When you speak your listing, choose something that people in your area actually sell. Tomatoes, milk, handicrafts, stitching services — whatever is common in your village. This makes the reel more relatable. Viewers think "I could sell MY products like this!"
When the form fills in automatically, react like you are genuinely amazed (even if you have done it 10 times before). Your energy is what makes the viewer feel the wow. Let your voice go up. Say "LOOK at this!" with real excitement.
The voice input part must work perfectly on camera. Practice it 5 times before recording. Speak at a natural pace, slightly louder than normal. Pronounce each word clearly. If the app does not understand perfectly on the first try, record again — do not use a take where the voice recognition fails.
Before you record this reel, do the voice listing 3-4 times to make sure it works correctly. Sometimes the app might misunderstand a word, or your internet might be slow. You want the recording to be smooth and perfect. If the voice recognition is not working well, try: speaking louder, being in a quieter room, or having a stronger internet connection.
Maine bina ek letter type kiye listing bana di! 🤯 KaryoSetu pe voice se listing banao — sirf bol ke! No typing, no forms. Ye app gaon ke logon ke liye bani hai. Try it! ✨ Link in bio to download. #KaryoSetu #VoiceListing #RuralIndia #TechForVillages #MadeInIndia
What if you could create a shop listing just by SPEAKING? 🗣️ No typing. No computer. Just your voice in Hindi. KaryoSetu makes it possible. Watch till the end to see the magic moment! 👀 Download link in bio 👇 #KaryoSetu #VillageEntrepreneur #DigitalIndia #AppTutorial
This might be the coolest app feature I have ever seen. Speak in Hindi ➡️ Get a complete listing. KaryoSetu is changing the game for small sellers and farmers. Share this with someone who sells products! 🙏 #KaryoSetu #SmallBusiness #VoiceTech #RuralEmpowerment
Use this combination of hashtags for maximum reach:
| Category | Hashtags | Why |
|---|---|---|
| App-specific | #KaryoSetu #KaryoSetuApp #VoiceListing | Brand recognition |
| Feature-related | #VoiceSearch #NoTyping #AppTutorial | People searching for cool features |
| Audience-related | #RuralIndia #VillageLife #GaonKiTech | Reaches your target audience |
| Movement | #DigitalIndia #MadeInIndia #TechForAll | Aligns with bigger conversations |
| Trending formats | #Tutorial #HowTo #LearnOnInstagram #Reels | Gets picked up by Instagram algorithm |
This is your big assignment for this module. Follow these steps:
You have recorded your screen, narrated the steps, and captured the magic. Now it is time to polish your reel so it looks professional and keeps viewers watching. Editing does not need to be complicated — even small changes can make a huge difference.
A raw, unedited screen recording can feel boring. Loading screens, accidental taps, long pauses — all of these make viewers lose interest. Editing removes the boring parts and highlights the exciting parts. Think of editing like ironing clothes — the clothes are fine, but ironing makes them look sharp.
| App | Price | Best For | Difficulty |
|---|---|---|---|
| Instagram Reels Editor | Free | Quick trims, text, music | ⭐ Very Easy |
| CapCut | Free | Text overlays, effects, transitions | ⭐⭐ Easy |
| InShot | Free (with ads) | Trimming, text, speed adjustment | ⭐⭐ Easy |
| VN Video Editor | Free (no watermark) | Advanced editing, keyframes | ⭐⭐⭐ Medium |
We recommend CapCut for most Setu Stars. It is completely free, has no watermark, and is very easy to learn. It has all the features you need: trimming, text overlays, music, and even auto-captions. Download it from the Play Store.
This is the most important editing step. Go through your recording and cut out:
Before trimming: 1 minute 45 seconds (too long — app loading takes 12 seconds, you paused for 8 seconds at one point, the end has 15 seconds of nothing)
After trimming: 58 seconds (perfect! All the dead time is gone, the tutorial flows smoothly from step to step)
Text overlays make your tutorial much easier to follow. When you say "Step 1," also show "Step 1: Open the App" as text on the screen. This helps viewers who watch without sound (many people watch reels on mute!).
| When | Text to Show | Position | Duration |
|---|---|---|---|
| Opening hook | The hook question or statement | Center of screen | 3-4 seconds |
| Each step | "Step 1: Open the App" etc. | Top or bottom of screen | 5-7 seconds (while you do the step) |
| Wow moment | "It understood everything! 🤯" | Center, large font | 3-4 seconds |
| Call to action | "Download KaryoSetu — Link in Bio 👇" | Center of screen | 5 seconds (until end) |
After adding text overlays, watch your reel on mute. Can you still understand what is happening just from the text and the screen recording? If yes, your overlays are great! If not, add more text or make it clearer. Remember: many people watch reels without sound initially.
Background music adds energy to your reel. But for tutorials, the music must be very low — your voice narration is more important.
The biggest mistake beginners make is adding music that is too loud. If viewers cannot hear your voice clearly because of the music, the entire tutorial is ruined. When in doubt, make the music softer. You can always test by sending the reel to a friend on WhatsApp and asking "Can you hear my voice clearly?"
Consistent branding makes your content recognizable. Here is what to include:
| # | Edit Step | Done? |
|---|---|---|
| 1 | Trimmed the beginning (removed "start recording" part) | ☐ |
| 2 | Trimmed the end (removed extra seconds after CTA) | ☐ |
| 3 | Removed all loading screens / long pauses | ☐ |
| 4 | Removed any mistakes or wrong taps | ☐ |
| 5 | Added hook text at the beginning | ☐ |
| 6 | Added "Step 1, Step 2..." text overlays | ☐ |
| 7 | Added call to action text at the end | ☐ |
| 8 | Added background music at low volume (10-15%) | ☐ |
| 9 | Added your handle / branding | ☐ |
| 10 | Total reel length is between 45-60 seconds | ☐ |
| 11 | Watched on mute — still makes sense with text only | ☐ |
| 12 | Sent to a friend for feedback | ☐ |
Here is how long editing should take for one tutorial reel:
Step 1 (Trimming): 5-8 minutes — watch the video, identify parts to cut, trim them
Step 2 (Text overlays): 8-10 minutes — add 4-6 text overlays, adjust timing
Step 3 (Music): 3-5 minutes — browse music, add it, adjust volume
Step 4 (Branding): 2-3 minutes — add handle, final touches
Total: About 20-25 minutes per reel. It will get faster with practice!
Take the test recording you made in Chapter 2's homework. Now practice editing it:
This is just practice — the goal is to get comfortable with the editing tool before you edit your real tutorial reels.
Your tutorial reel is recorded and edited. Now you need the perfect caption and hashtags to make sure it reaches the maximum number of people. Think of the caption as the shop sign — a great reel with a bad caption is like a great product hidden in a dark alley.
Copy these templates and fill in the blanks with your tutorial topic. Each template has a different style — pick the one that matches your personality.
Template:
Tired of [PROBLEM]? 😤
I just found the easiest way to [SOLUTION] using KaryoSetu!
Watch this 60-second tutorial and you will never struggle again. 🎯
Save this reel for later ➡️ Share with someone who needs this!
Download link in bio 👇
Example filled in:
Tired of asking 10 people to find a good electrician? 😤 I just found the easiest way to find any service near you using KaryoSetu! Watch this 60-second tutorial and you will never struggle again. 🎯 Save this reel for later ➡️ Share with someone who needs this! Download link in bio 👇
Template:
Did you know you can [FEATURE] on KaryoSetu? 🤔
Most people don't know about this feature. But it can save you [TIME/EFFORT].
I made this quick tutorial so you can learn in under 1 minute.
Follow me for more KaryoSetu tips every week! ✨
#KaryoSetu #Tutorial #AppTips
Example filled in:
Did you know you can search for anything using your VOICE on KaryoSetu? 🤔 Most people don't know about this feature. But it can save you so much time. I made this quick tutorial so you can learn in under 1 minute. Follow me for more KaryoSetu tips every week! ✨ #KaryoSetu #Tutorial #AppTips
Template:
How to [ACTION] on KaryoSetu — step by step tutorial! 📱
Step 1: [BRIEF STEP]
Step 2: [BRIEF STEP]
Step 3: [BRIEF STEP]
That's it! Easy, right? 😊
Watch the full tutorial above for detailed steps.
Download KaryoSetu — link in bio!
Example filled in:
How to create an account on KaryoSetu — step by step tutorial! 📱 Step 1: Open the app and tap Sign Up. Step 2: Enter your phone number and verify OTP. Step 3: Add your name and village. That's it! Easy, right? 😊 Watch the full tutorial above for detailed steps. Download KaryoSetu — link in bio!
Template:
Secret trick most people don't know about 🤫
You can [IMPRESSIVE FEATURE] on KaryoSetu and it takes only [TIME].
I was shocked when I discovered this. Watch the reel to see how!
Tag a friend who needs to see this 👇
Download link in bio ✨
Example filled in:
Secret trick most people don't know about 🤫 You can create a complete listing just by SPEAKING on KaryoSetu and it takes only 30 seconds. I was shocked when I discovered this. Watch the reel to see how! Tag a friend who needs to see this 👇 Download link in bio ✨
Template:
This one is for all the [TARGET AUDIENCE] out there! 🙌
[PROBLEM THEY FACE]. Sound familiar?
KaryoSetu makes it so easy to [SOLUTION]. Watch how I do it in this tutorial.
Share with every [TARGET AUDIENCE] you know!
Download — link in bio 👇
Example filled in:
This one is for all the farmers and small sellers out there! 🙌 Selling products online seems complicated, right? Sound familiar? KaryoSetu makes it so easy to list your products — you don't even need to type! Watch how I do it in this tutorial. Share with every farmer and small seller you know! Download — link in bio 👇
Instagram allows up to 30 hashtags, but using 15-20 well-chosen hashtags is ideal. Here are ready-made hashtag sets for different tutorial topics:
#KaryoSetu #KaryoSetuApp #KaryoSetuTutorial #AppTutorial #HowTo #Tutorial #LearnOnInstagram #TechTips #PhoneTips #DigitalIndia
| Tutorial Topic | Additional Hashtags |
|---|---|
| Download / Account Setup | #NewApp #AppDownload #GetStarted #IndianApp #MadeInIndia #SupportIndian |
| Voice Search / Voice Listing | #VoiceSearch #VoiceTech #NoTyping #HindiTech #SpeakAndSearch #AIpowered |
| Categories / Services | #FindServices #LocalServices #NearMe #PlumberNearMe #ElectricianNearMe #ServiceProvider |
| Creating Listings / Selling | #SellOnline #SmallBusiness #VillageEntrepreneur #Entrepreneur #OnlineSelling #StartSelling |
| Government Schemes | #SarkariYojana #GovernmentSchemes #YojanaJankari #BenefitsForAll #GovtSchemes |
| Sharing / Family / Referral | #ShareWithFriends #FamilyApp #ReferAndEarn #InviteFriends #EarnMoney |
| AI Assistant (Samjho) | #AIAssistant #AskAI #SmartApp #ChatWithAI #TechForGood #Innovation |
| Language Features | #HindiApp #MarathiApp #MultiLanguage #AppInHindi #LocalLanguage |
#RuralIndia #VillageLife #GaonKiTech #TechForVillages #RuralYouth #DigitalGaon #YuvaShakti #IndianYouth #SmartVillage #GramPanchayat
Put your hashtags at the END of the caption, not at the beginning. Some creators put them in a comment instead of the caption — both methods work. The important thing is to use relevant hashtags that match your content. Never use irrelevant trending hashtags just for views — Instagram can shadow ban your account for this.
Posting at the right time can double or triple your views. Here are the best times for posting tutorial content aimed at rural Indian audiences:
| Day | Best Time Slot 1 | Best Time Slot 2 | Why |
|---|---|---|---|
| Monday – Friday | 7:00 AM – 9:00 AM | 7:00 PM – 9:00 PM | Morning: people check phones before work. Evening: people relax and scroll after work. |
| Saturday | 10:00 AM – 12:00 PM | 7:00 PM – 10:00 PM | Weekend mornings are relaxed. Evenings people have free time. |
| Sunday | 9:00 AM – 11:00 AM | 5:00 PM – 9:00 PM | Sunday is the highest engagement day. Afternoon and evening are peak. |
While posting at the right time helps, posting consistently is MORE important. If you post 2-3 tutorial reels every week at roughly the same times, Instagram's algorithm will start showing your content to more people. Pick a schedule (e.g., Tuesday 8 PM and Saturday 10 AM) and stick to it.
Here is a suggested weekly posting schedule for your first month of tutorial reels:
| Week | Tuesday Reel | Saturday Reel | Sunday Bonus |
|---|---|---|---|
| Week 1 | Tutorial 1: Download KaryoSetu | Tutorial 2: Create an Account | (Optional) Behind-the-scenes: you making the reel |
| Week 2 | Tutorial 5: Add Photos to Listing | Tutorial 6: Browse Categories | (Optional) Q&A: answer viewer questions |
| Week 3 | Tutorial 3: Voice Search (wow factor!) | Tutorial 7: Contact a Seller | (Optional) Share a success story |
| Week 4 | Tutorial 4: HERO REEL — Voice Listing | Tutorial 9: Change Language | (Optional) Tutorial 10: Share on WhatsApp |
Here is the ideal structure for any tutorial reel caption:
Line 1: Hook — grab attention (use an emoji)
Line 2-3: Describe the problem and promise the solution
Line 4: Mention a key benefit or surprising detail
Line 5: Call to action (save, share, download)
Line 6: "Link in bio" or "Follow for more tips"
Line 7+: Hashtags (15-20)
After posting your tutorial reel, do not just forget about it. Engage with every comment for at least 1-2 hours after posting. This tells Instagram's algorithm that your content is generating conversation, and it will show your reel to more people.
| Comment Type | Example Comment | Your Reply |
|---|---|---|
| Positive feedback | "This is so useful! Thanks!" | "Thank you! 🙏 Share it with your friends who might need this. Follow for more tutorials every week!" |
| Question about the app | "Is this app free?" | "Yes, KaryoSetu is completely free! Download from the link in my bio 😊" |
| Feature request | "Can you show how to do [X]?" | "Great idea! I will make a tutorial on that soon. Make sure you follow so you don't miss it! 🔔" |
| Doubt or confusion | "I tried but it is not working" | "DM me and I will help you step by step! 💪" |
| Tagging a friend | "@friend check this out" | "Welcome @friend! Let me know if you need any help with the app 😊" |
When replying to comments, always end with a question. This encourages more replies and boosts engagement. Example: Instead of just "Thanks!" say "Thanks! Have you tried the voice search feature yet? It is amazing!" This keeps the conversation going.
Do not just post on Instagram! Share your tutorial reels on other platforms too:
When sharing in WhatsApp groups, do not just drop the link without context. Write a short message: "Hey everyone! I made a helpful tutorial on how to find services near you using KaryoSetu. Check it out!" Being polite and giving context gets much better results than just spamming links.
Take 10 minutes to write down your personal action plan:
Write this plan in your notebook or phone notes. Share it with your Setu Star mentor. Having a clear plan makes you 3x more likely to actually do it!
Congratulations on completing Module 4! You now have everything you need to create amazing tutorial reels — the topics, the scripts, the format, the editing skills, the captions, and the posting strategy. Remember: your first reel does not need to be perfect. It just needs to be done. The more you create, the better you get. Start today, and within a month, you will be surprised at how natural it feels. You have got this! 💪